nelson treehouse charm experiment in zbrush

Oh, these are the kinds of things that I do when I’ve been watching too much HGTV and Animal Planet!

I’ve long been a fan of the show Treehouse Masters and a really fascinating guy named Pete Nelson who—with a crew of extremely talented carpenters—build the most amazing treehouses. Not treehouses like the kind you had as a kid, but true works of art that just happen to be up in the air.

So tonight while watching I started thinking about my dream job building treehouses with Pete Nelson. Since they’re in Washington State, I’m guessing that dream will probably never happen.

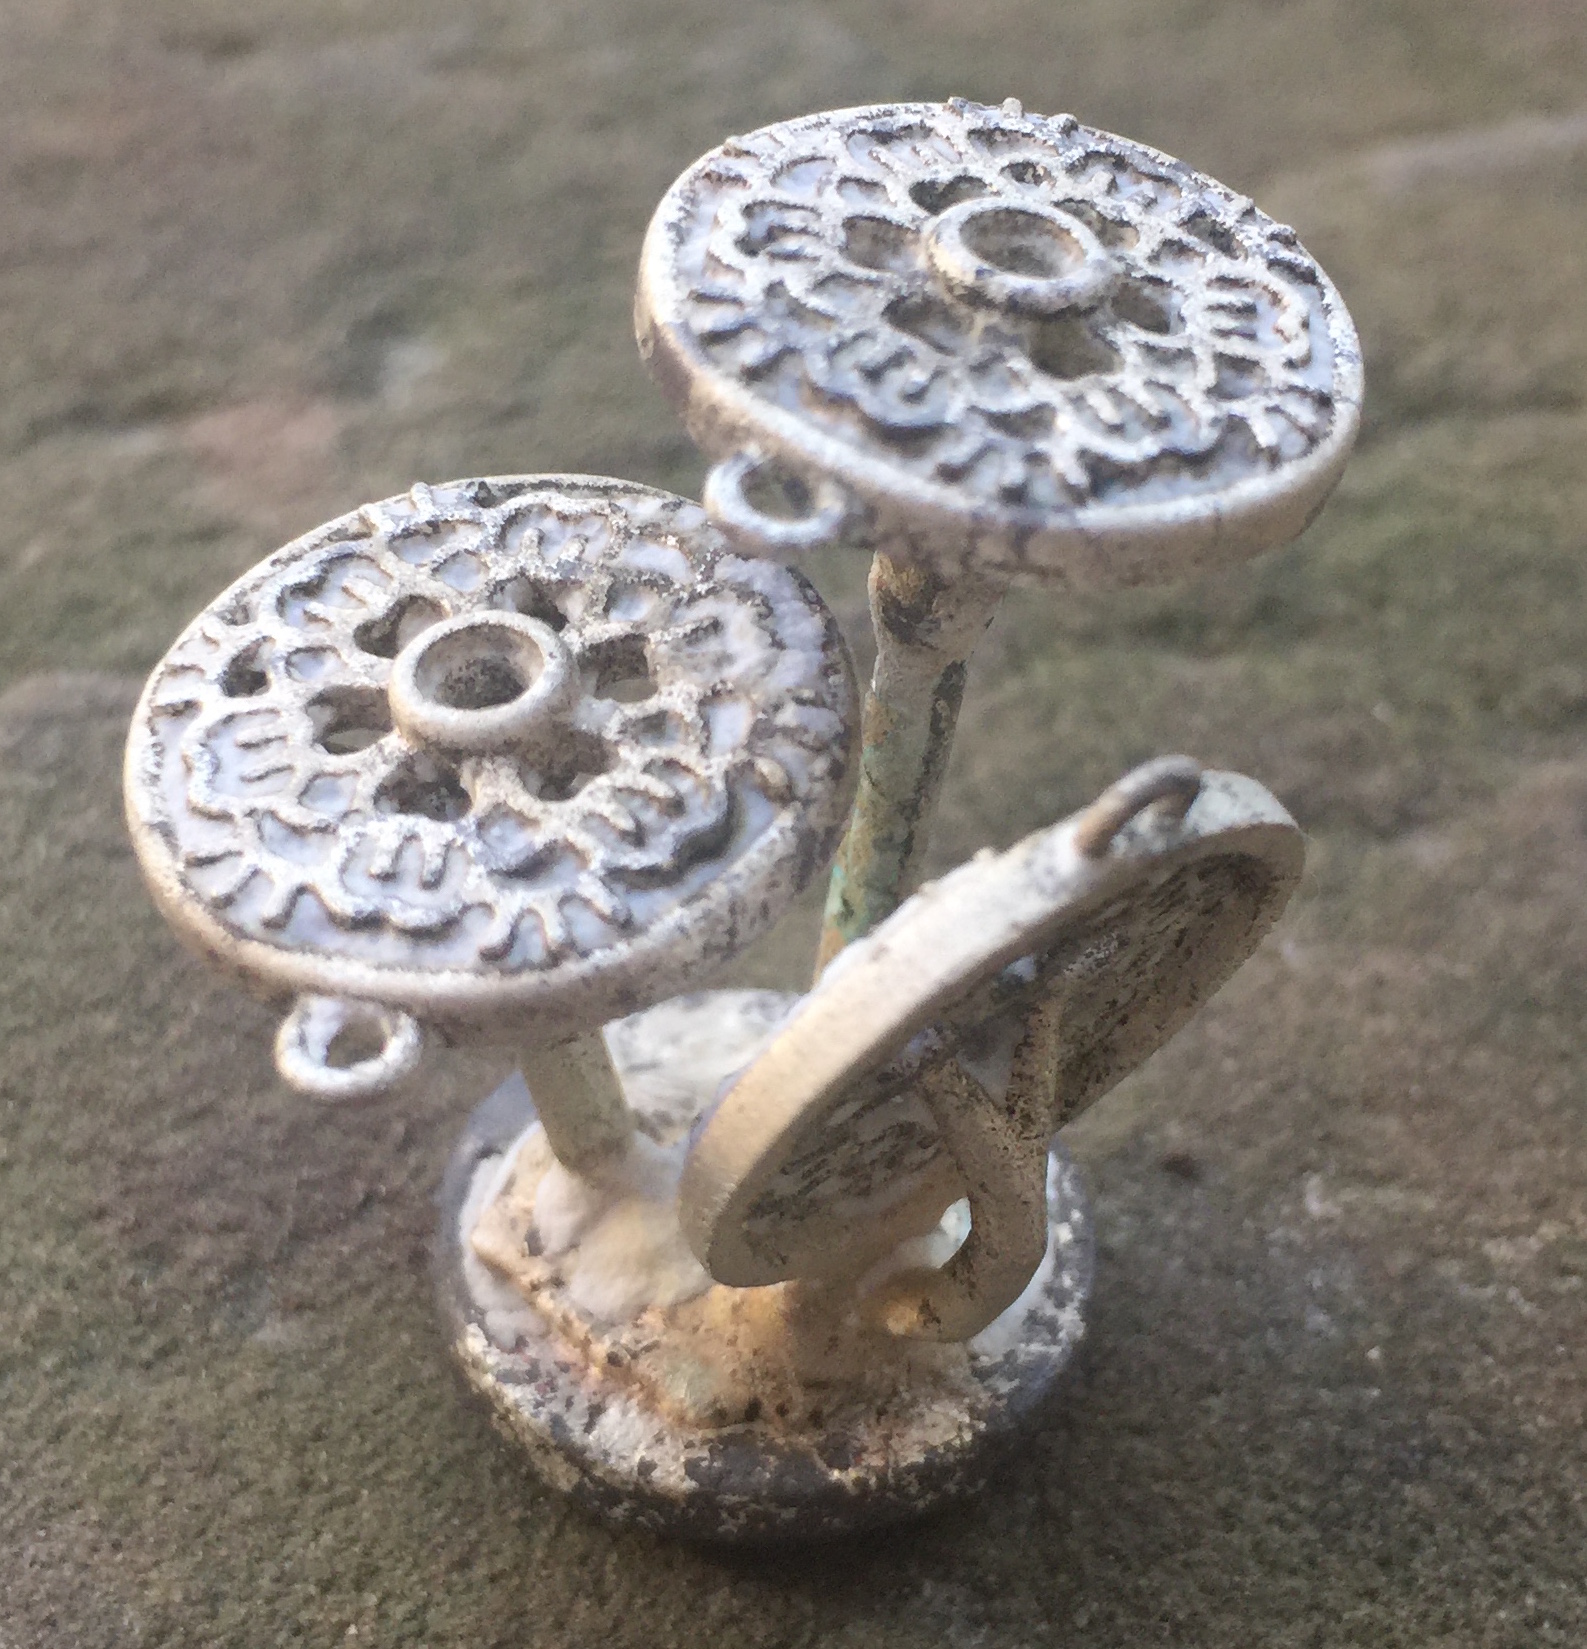
But I could still make a treehouse charm! Inspired by Pete’s wonderful Fall City treehouse, I created a little charm in ZBrush. I haven’t really paid attention to the castability…this was more of an exercise.

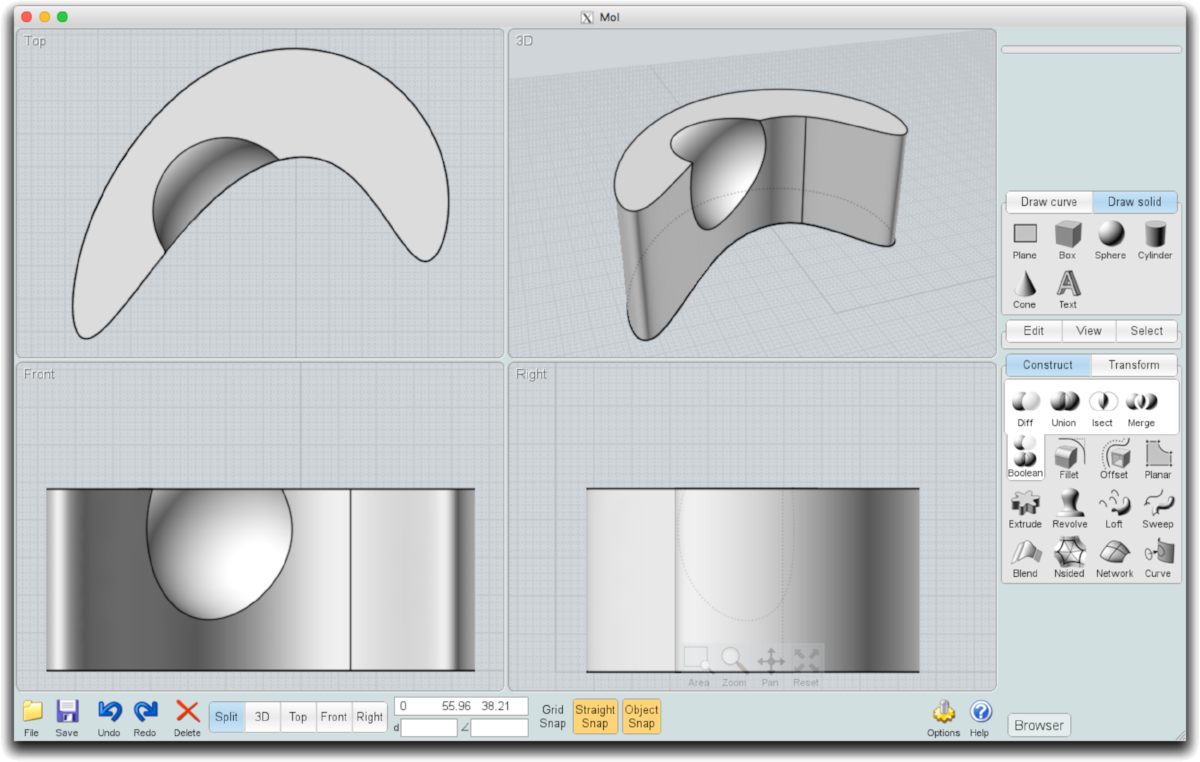
It involved a lot of subtools, and a custom chain. The main treehouse was created out of a Cube3D primitive, trimmed using the Clipping function. The deck was extracted from another cube, drawn freehand with a lasso mask.

I’ve kept all of these subtools separate…for example, I may resize the trees to make the volume of the two trees on the left more closely match the tree on the right so it would sit correctly.

Still not sure how I would sprue this puppy for casting, but it may make its way to my printer in the next few weeks.

And who knows? Tonight’s episode featured Pete and the guys here in Texas building a treehouse near the Frio River. I’d even volunteer for free if he ever needed help here in the Lone Star State. I have tools and a tent and a ukulele!

Pete, call me!

A proof-of-concept charm based on Pete Nelson’s Fall City treehouse

A proof-of-concept charm based on Pete Nelson’s Fall City treehouse

an experimental earring from a kaleidoscope program

mandala-3.jpg

I'm just putting this experimental earring up here because I think it turned out pretty cool! Created in the new ZBrush Core.

I used a kaleidoscope drawing program that I found on the internet to make the basic design, used the Gaussian Blur tool in Photoshop to blur the jagged edges, then Unsharp Mask to bring it back into focus. The design was then brought into ZBrush as an alpha mask, turned into a polygroup, isolated, then extracted. The resulting mesh was then Dynameshed so it could be sculpted, then divided (using Subdivisions and the Divide function) to give a finer mesh for sculpting.

UPDATE: I’m now using iOrnament on the iPad with the Apple Pencil as a design tool for repeating patterns and mandalas. It eliminates the problem of having to blur the image and sharpen…just use AirDrop and send it over to your computer!

BIG DISCLAIMER: I wouldn't say that this is my best design work, but it was more of an experiment...so carry on.

Rendered image from ZBrush

I used the Helix tool in ZBrush to create the coil on the drop, added some jump rings, then brought in a Cube primitive and Dynameshed it so I could draw a mask and create the darker supports that would recess into the background after a patina was applied. The original supports were straight. The curls add a nice touch that mirrors the swirls on the main design.

By the way...using the MRGB function in ZBrush, you can "paint" different areas to mimic the patination applied during finishing. Just choose a material, and change the color to a darker gray. This behaves a little differently than using the "dirty" silver MatCap material, and results in a more dramatic presentation of the finished piece.

UPDATE: When this earring was printed and cast, it was too thick and too heavy. Thanks to the technology, I was able to shrink the thickness, enhance the scrolls, and reprint. The great thing about having a printer on your workbench is being able to make adjustments and test techniques. 

The models with supports added, ready to print. This version was too thick and too heavy.

MoI — moment of inspiration CAD software

types of CAD modeling

After taking an online course on jewelry in ZBrush, I was a little frustrated that the instructor was going back and forth between ZBrush ($795) and another piece of "parametric CAD" software that was more expensive. I had a few early attempts to stretch SketchUp's capabilities to make basic forms for ZBrush that worked okay, but since then I've learned more about ZBrush's ZModeler functionality for hard surface modeling.

Simple flower made in virtual "clay" in ZBrush

So you say, "Kat, you're using that crazy terminology again, and I have no idea what you're talking about." Let me explain.

ZBrush gives you the ability for more freeform modeling. Imagine sculpting with a ball of clay in real life...you can push and pull the material into organic shapes, creating a model in a very realistic way but in a new medium. The flower shown here is a very basic example of this type of freeform modeling in ZBrush. However, the flower was originally created in ZModeler as a hard-surface model, then sculptural details added with other more freeform brushes.

The ZModeler mode in ZBrush is great for creating hard-surface models...this would be like modeling a starfighter...you might start with basic shape and push and pull surfaces to make something more mechanical looking. Here's a fascinating time-lapse video of "Alex O" modeling a war helmet in ZBrush with ZModeler. In jewelry design, I might use the ZModeler functionality to create a square frame for a pendant, then an inner medallion, then switch over to soft sculpting to create the design. When creating a base for 3D printing, I also use the ZModeler functionality. Here's another great video from Alex O that shows him using ZModeler to make a geometric ring.

However, something like SketchUp (SketchUp Make, FREE download) is a little more rigid. I can create a box, then push and pull geometric shapes. But if I were making a box that I wanted to be exactly 20 cm, I have a precision built in to the program that can make that happen. That is a characteristic of a "parametric" 3D modeling program. That makes SketchUp...like AutoCAD, Fusion360 (cloud-based, FREE for hobbyists), Solidworks, and similar software...perfect for creating technical drawings and product designs. For example, I used SketchUp to design my jewelry workbench.

moment of inspiration (MoI)

I had some issues with creating printable models in SketchUp, so I started looking around for another "technical" drawing solution that wouldn't break the bank. Enter Moment of Inspiration, also known as MoI. MoI is $295, works on both Mac and PC, and has a 30-day trial.

At first I was a little skeptical. The interface was pretty basic, and definitely wasn't written to take advantage of the Mac interface I'm using. But then again, neither is ZBrush. After a couple of YouTube videos I was up and running, and I was able to figure out the rest on my own. 

So what is MoI good for? Probably almost any kind of technical modeling you might want to do except freeform "clay" type modeling. You could take a freeform "extruded" shape and "subtract" a sphere from it. Combining different "primitive" shapes, such as cubes, cylinders, and spheres, you can make pretty complex models that export well. Turning on a "grid snap" or "object snap" helps line things up. Then you can export these items easily, bringing them into the PreForm or other "slicing" software that prepares the file for 3D printing.

Some rubber mold frames made in MoI

I jokingly say that the second phase of having access to a 3D printer is when you start making your own tools. I purchased some frames for making rubber molds from Rio Grande, but they were too wide to fit in a nifty little spring clamp that holds the split mold together while filling with hot wax. Additionally, trying to estimate the amount of two-part "RTV" (room temperature vulcanizing) mold material usually resulted in wasted material...and at $56 a container, it's too expensive to do that! So my "improved" version has markings on the side to indicate centimeters, and a handy spreadsheet calculates the exact volume and weight of RTV needed. Remember the ability to measure in a parametric modeling program? Because MoI works that way, my one centimeter marks are accurate when printed. In ZBrush, that would be more difficult.

And because I'm a dork, I added www.katkramer.com and my logo to the side...and it was backwards, so when the rubber mold is made, my website address doesn't read correctly. Oh well, there's always version 2.

So in a nutshell, MoI is a nice little program, and the models created are accurate in size. It is a nice alternative to more expensive programs for making basic models to bring into ZBrush.


finally casting...the mandala pendants

UPDATE, December 2017: Looking back at this post, there are so many things that are wrong! Anyway, a good exploration of what works and what doesn't, and modifying a design to cast and finish more easily. The main change I eventually made to this pendant is to attach the design to a backplate, so the design is simply raised from a background. With a patina, the design is similar but much easier to cast and finish. I have since scrapped this design and melted them all down. So maybe they'll be collector's items someday! And oh my goodness…thankfully my design skills have come a long way. I’ll leave this post up, though, just in case others are having the same issues.

Well, it's finally time. What better time to start casting holiday gifts than a week before Christmas?

It's been an interesting journey. It started back in Denver after I got the casting setup...I remember that my first attempt at casting with a perforated flask, I ran out of acetylene at 1 a.m. and didn't have a way to heat enough metal to cast. The second attempt, I realized that my acetylene/ambient air torch couldn't heat enough metal hot enough to cast. After switching to my old Smith Little Torch (acetylene/oxygen) with a "bud tip," I was able to get the metal melted, but never cast before we suddenly moved back to Texas.

Fast forward over a year. Since then I've taken the wax-working class with Kate Wolf, learned ZBrush, and explored printing in 3D on the Formlabs Form 2. I've printed a lot of things, but the missing link was casting them into metal jewelry.

So I was ready to go! Treed up some models, was burning them out, and my kiln fell victim to the outdoor sprinkler. Since I work late at night usually, I didn't realize that the sprinkler was scheduled to water the lawn that night. The kiln was sitting on a little window in the outdoor kitchen burning out my first 3D model flask, and a poorly aimed sprinkler doused the kiln and killed it. I awoke to an error message and a flask that hadn't completed burnout. I was crushed.

So what do you do when your Paragon SC2 kiln has been watered? Let it sit for a few days and let it dry out. Since this kiln has a metal cabinet, I removed the back and aimed the fan on the inside. Sure enough, about four days later I had the guts to turn it back on. It worked.

Next, I was ready to cast the 3D prints. I prepared the trees, the flask, and tried casting again. I was still having difficulty getting the metal heated correctly. About that time I was helping my parents downsize their house, and my dad gave me a little present...the Kerr Electro-Melt that I needed to get the metal to the right temperature for casting. Something I've learned through research—not in practice—is that metal can be porous if overheated. When melting with a torch, you don't really know how hot the metal is. Any casting I've done in the past was on a very small scale, and I probably just got lucky!

Incomplete casting

Incomplete casting

So I was ready to cast, and treed up some nine models. This time when I cast, I heated the sterling silver to about 1740°F (Kerr recommends going 100°F above the melting temperature of the metal, and silver is about 1640°F). I used the Formlabs castable resin burnout schedule, which clocks in at about 14 hours, landing on a 900°F casting temperature with a 3.5"x4" perforated flask. The result was not good!

But why?

After consulting Creative Side Jewelry Academy here in Austin, and the Formlabs forum, I found that it could be either the metal was not hot enough, or the flask was not hot enough. I found in another article that the flask can drop about 100°F in one minute in a vacuum caster, so it suggested making your flask temperature 100°F hotter. Also, filigree designs require a slightly hotter flask. The girl at Creative Side asked if I cast close to 1100°F, and I remember casting at or near that temperature in the past. Participants in the forum suggested between 900°F, or 950°F for filigree. Then the suggestion that every casting situation is different and these numbers are just guidelines, so it requires experimentation. 

Fast-forward two years later, and my settings now are this: flask temperature at the end is 975°F, and metal in my Kerr Electro-Melt is 1865°F.

So I set off to cast again. This time, I used two 2"x2.5" flasks, a 2.5"x2.5" flask, and a 2.5"x3" flask, each with three models, rather than trying to cast a tree with ten models (or more?). I also tried adding a forked sprue coming into the bezel on the back, and another configuration with four sprues coming to the back of the frame. On that one I also added two small sprues coming into the back of the bezel. The sprues on the back of the frame are very easy to clean up, but when I 3D printed this one, the different support configuration distorted the frame on the bottom.

I also conquered my fear of cleaning up the jewelry! I learned from the forum that I should try tumbling the pendants for longer (these were polished about 40 minutes on a rotary tumbler), and silicone wheels work well for cleaning up raw castings. So far I hadn't had much luck with them. So I busted out the kit and it worked!  I also tried these little wheels made with 3M micron finishing papers, and they worked well for grinding down the sprues from the back and finishing the back of the frame. And something surprising...the back of the pendant with a patina is as pretty as the back...so it's reversible. I'll have to play around more with that.

However, they were still usable, and became Christmas gifts!