Huichol Leaves Tutorial
It’s been awhile, and I’ve been focused on some other projects, but noticed that lots of folks are visiting my beading tutorials.
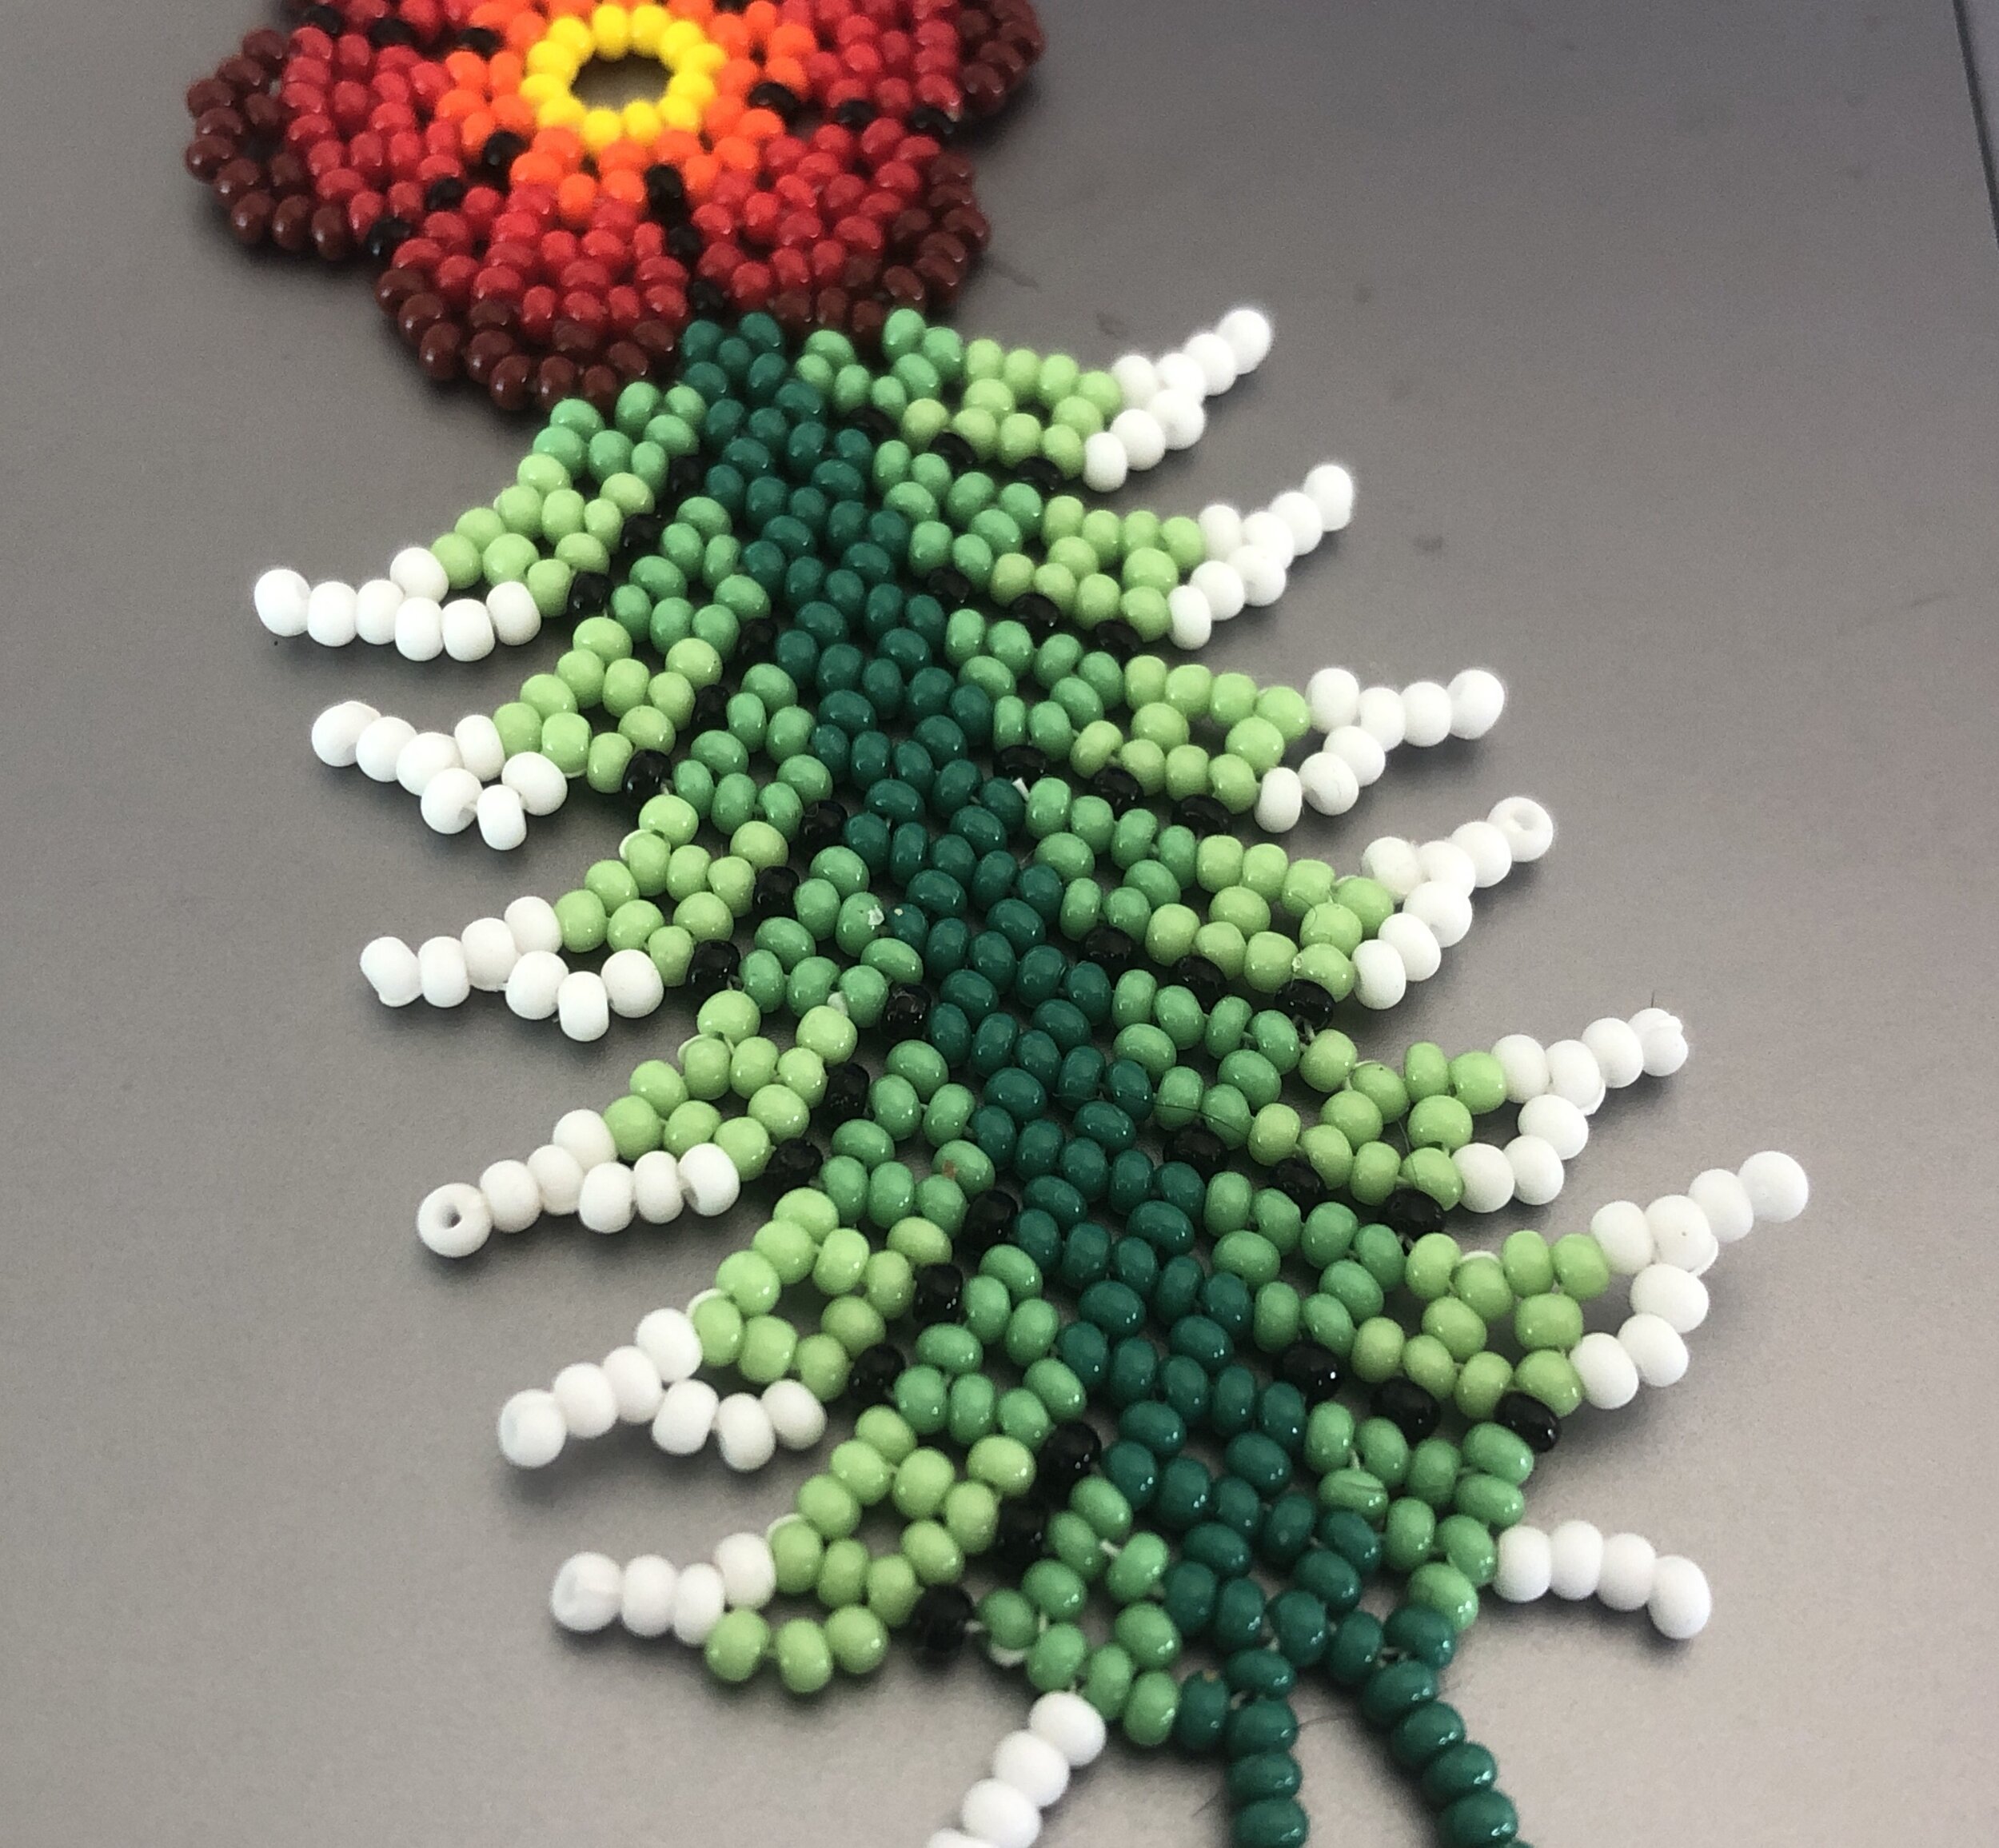
Late in 2019, I finally found a workable solution for a “leafy” bracelet band while looking to create a Huichol band for my Apple Watch…I’ll post more details on that later. But for the time being, here is a little tutorial on how to create the leafy band.
There’s a little trick to beading it onto another flower, and I’ll also add that later, but at least you can practice on this piece.
About the Beads Used
I tried these techniques in the beginning with beads purchased from a local bead shop and also Michael’s, but eventually learned that the Huichol artists use Czech Preciosa Ornelo rocaille beads exclusively, mostly in a size 11/0. The most durable choice will be the opaque or transparent beds, although some of the brighter colors (like the pinks and purples) have a coating that makes them a little less durable.
Click here for a handy link to the Preciosa Ornelo beads at Shipwreck
Click here for a handy link to the same beads at Fire Mountain
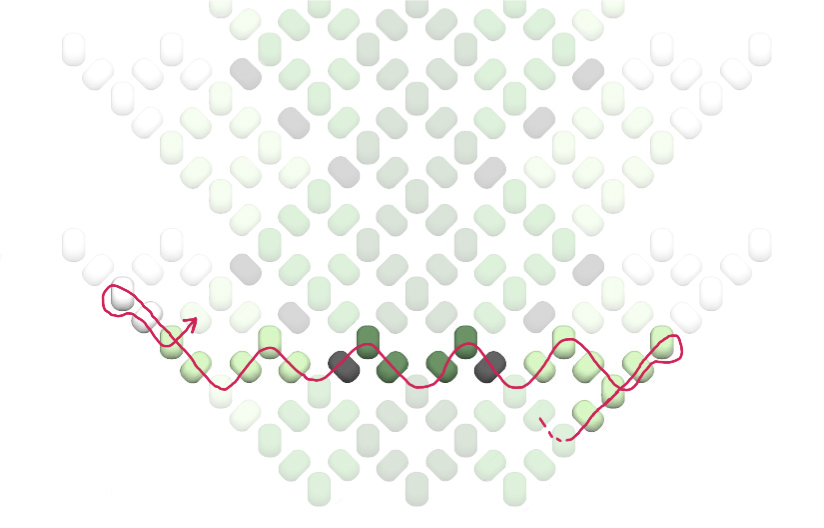
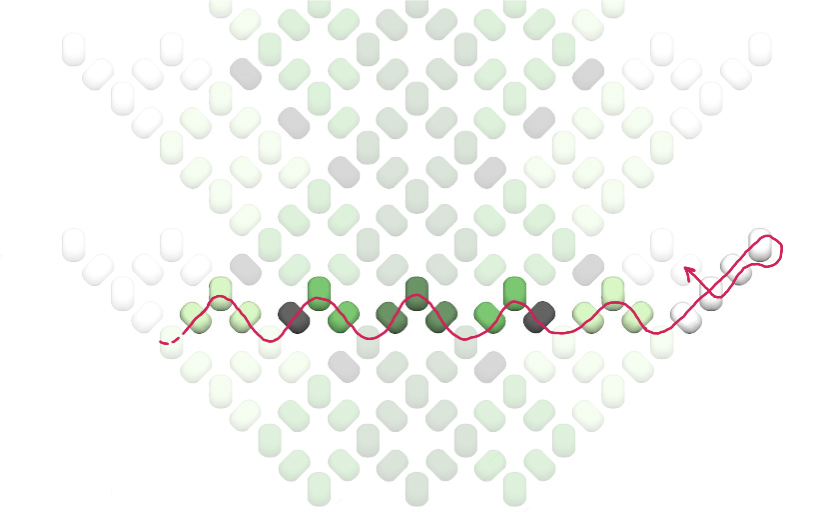
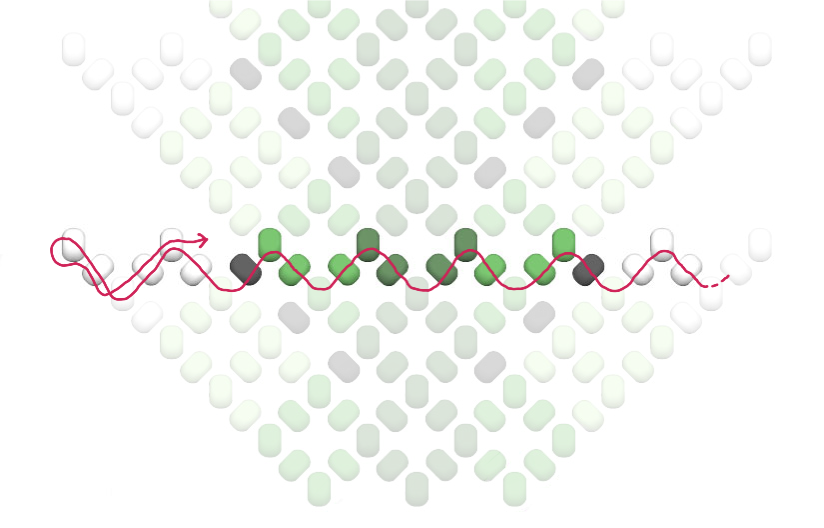
One last note...I do not consider myself a "beader," so my diagrams are a mix of styles I've found that work for me. The only thing I might point out is that a "dashed" line shows where the thread was coming from in the previous step. I also lighten the previous rows of beads to focus on the new beads being added. I usually have a second image that shows the new beads in context.
About the Thread Used
Huichol bracelets use a different thread that I have not been able to identify, but I've seen Polymide thread used. I used 10lb Fireline here for illustration purposes.
You want to make sure that your thread will fit through the holes of the beads. Size 11/0 Preciosa Rocaille Seed Beads have a minimum hole size of 0.60mm. 10lb Fireline is 0.20mm in diameter, so you can theoretically go through each bead three times. Preciosa publishes information about the size of their beads with this handy color chart.
Material List
Preciosa Rocaille beads, 11/0 in five colors. I’ve used three different greens, a white, and black.
Wildfire Thermally Bonded Bead Weaving Thread, .008 in, 0.20 mm, in white
Size 10 beading needle (a needle with larger hole will work as long as it fits through the beads). I also like the Beadalon Collapsible Eye Needles in a 2.5 in (6.4 cm) length
Sharp scissors (I have a nice small pair of Gingher scissors)
This tutorial, worksheets, all photos, and all diagrams are COPYRIGHTED, and may not be reproduced or sold without permission. If you are interested in using this tutorial, graphincs, or handout for teaching, please contact me directly. ©2017, Kat Kramer Adair.
UNDER CONSTRUCTION…click the arrows to cycle through the rows.

Starting Out
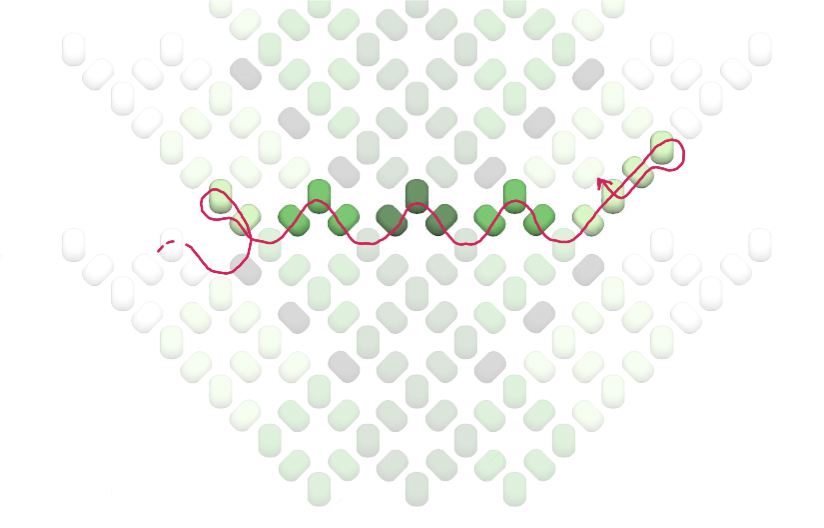
Use a bead stop or loop through the first bead to keep the beads from slipping off.
Slide four medium green, five dark green, four medium green, and two light green onto the thread.
Row 1

Skip the first light green bead, then go back through the next light green bead and the next medium green bead. Add three medium green beads, needle through the next dark green bead, add three dark green beads, needle through the last dark green bead, add three medium green beads, then needle through the last bead (medium green).
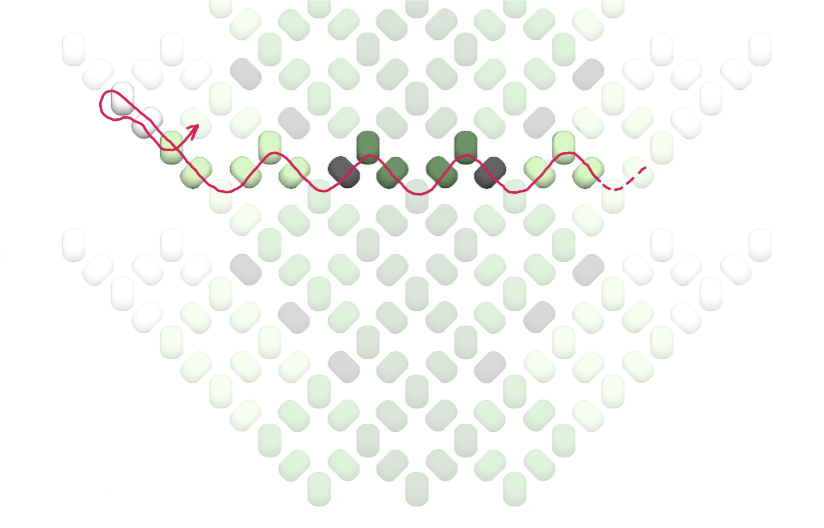
Row 2

Add four light green beads, then come back, skipping the first light green bead and needling through the next two light green beads. Add three light green beads, needle through the third medium green bead, add a black and two dark green beads, needle through the middle dark green bead, then add two dark green and one black bead, then needle through the second medium green bead. Add three light green beads, and needle through the last light green bead. Add two light green and two white beads.
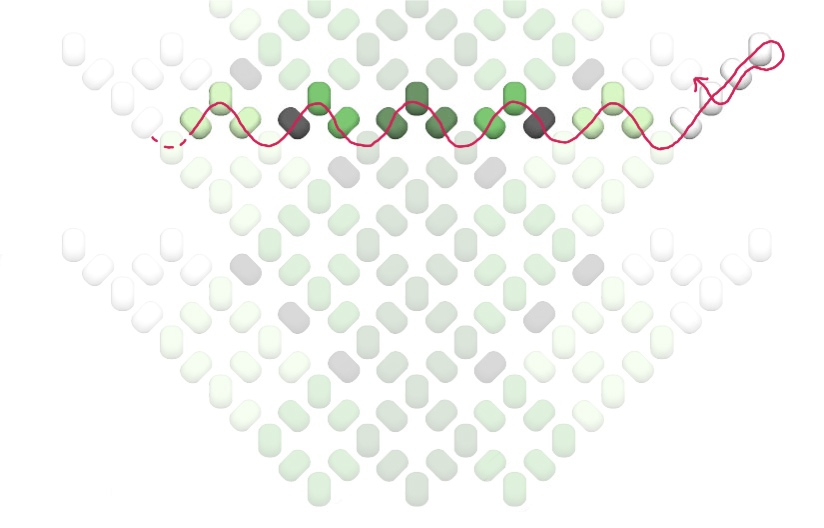
Row 3

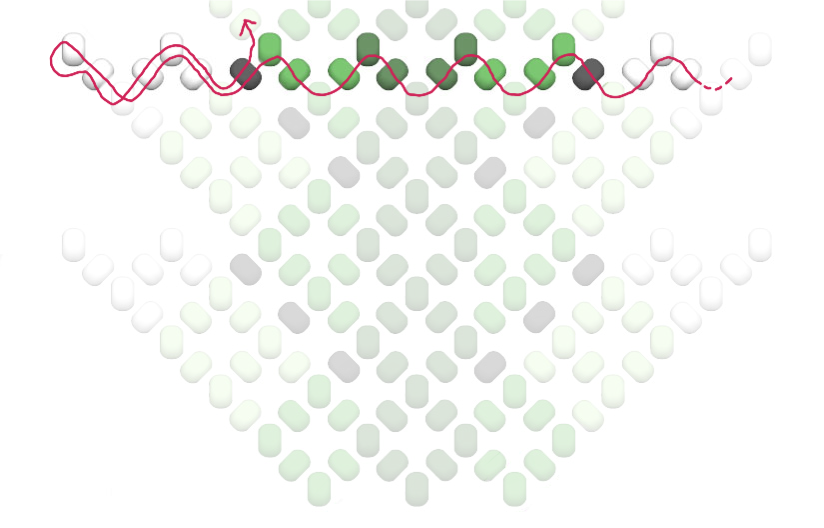
Row 4

Row 5

Row 6

Row 7

Row 8

After Row 8, go back to Row 5 and repeat…
I’ll write more here shortly, but this is a start!