adventures in zbrush

It's been a few months of working to master a program called ZBrush...literally the most difficult program I've ever worked with. It's a program primarily used for the creation of amazing creatures for the movie industry, but flexible enough it's being used by jewelry artists.

I've been fascinated by CAD since my senior project at the University of Texas in the early 1990s, where I made a ten-second video of a prickly pear cactus losing a fruit that bounced off a table and onto the floor. It was primitive, but took months of work. And at this point, I have no idea how models make their way out of ZBrush and into an actual movie, but the modeling is just downright amazing.

My goal is to be able to design jewelry and send it out eventually to a casting house while sitting in a beach cabaña on an island somewhere, but for the time being I'll be 3D printing the models and casting them myself. I am optimistic! 

I am also in the process of creating instructional videos in ZBrush for jewelry artists, and hope to be teaching others in the near future.

spruing and investing the wax models

So now I finally have something to cast! Time to start tearing through those unpacked boxes and find everything I need. Tongs, check! Torch, check! Casting investment, check-check!

Okay, I'm scared to death of this step. But time to bite the bullet and just do it.

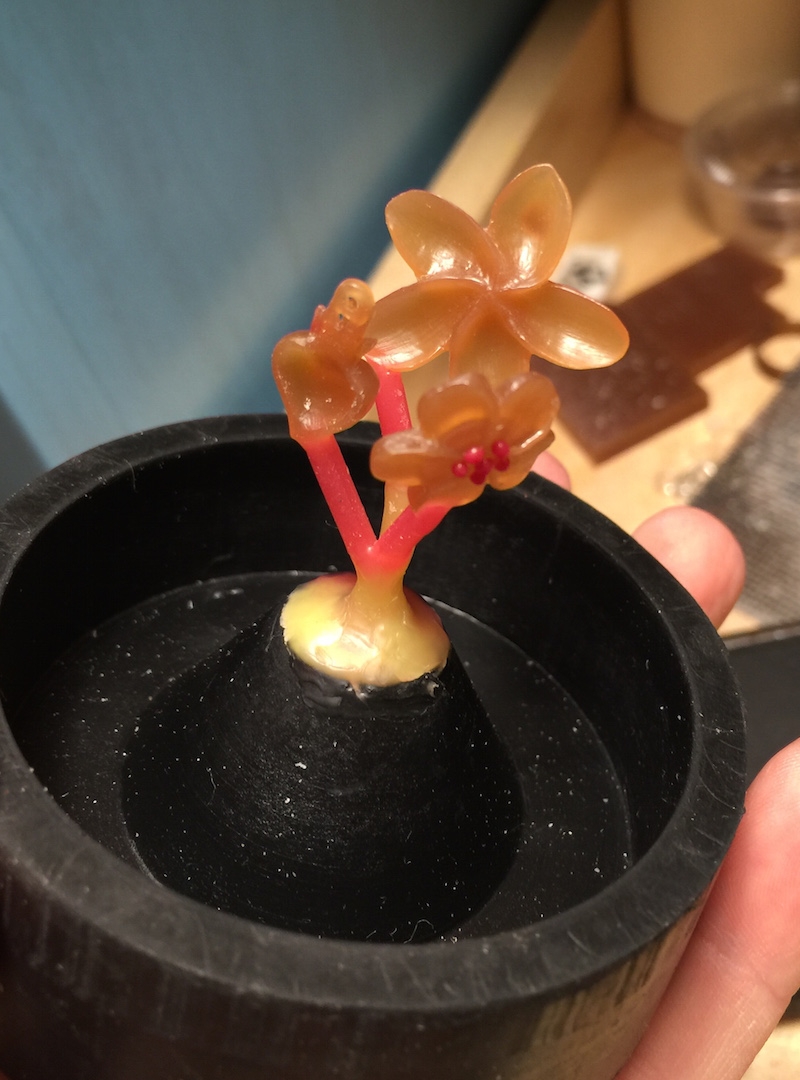
Step 1: Add the Sprues

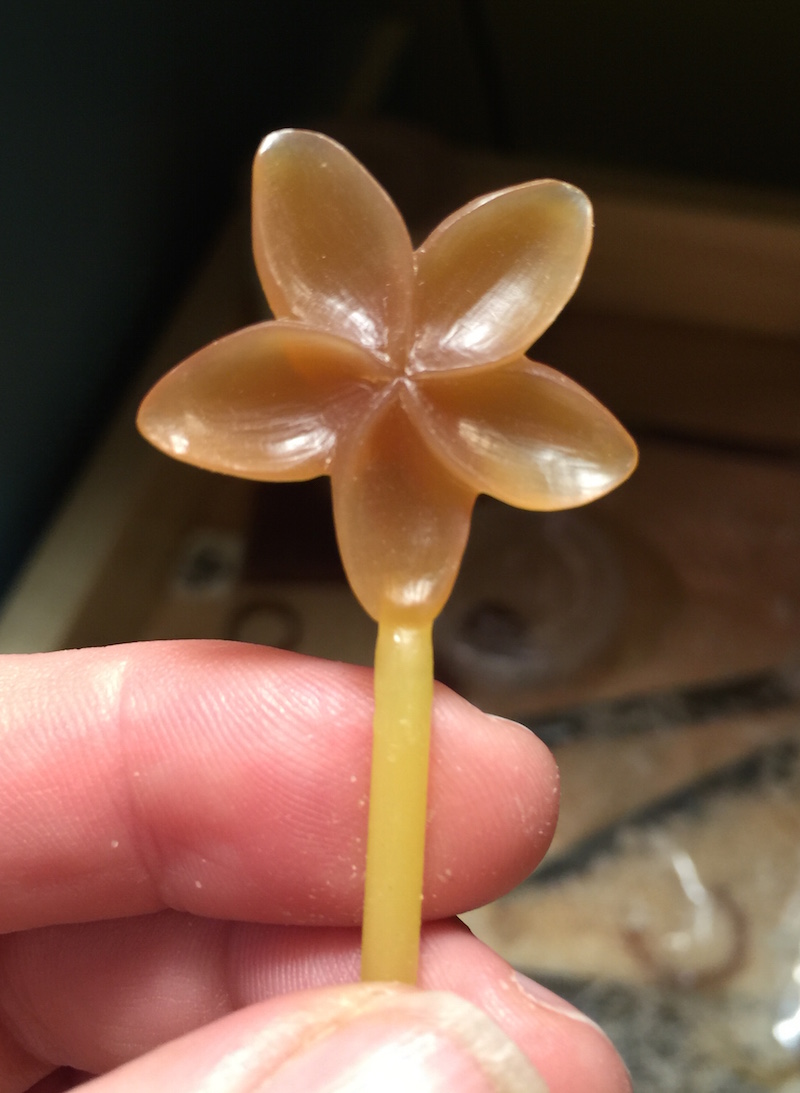
When you're creating a lost wax model, you need to add a "sprue," which creates a tube through which molten metal travels into the model cavity in the investment (like plaster of paris).

You'll want to weigh each model with a short sprue attached on a jeweler's scale, and make a note of the weight in GRAMS on a piece of paper. You'll use this to calculate the amount of metal needed.

If you're casting multiple items at the same time, you can make a "tree" of the separate models, connected with sprues to the button. 

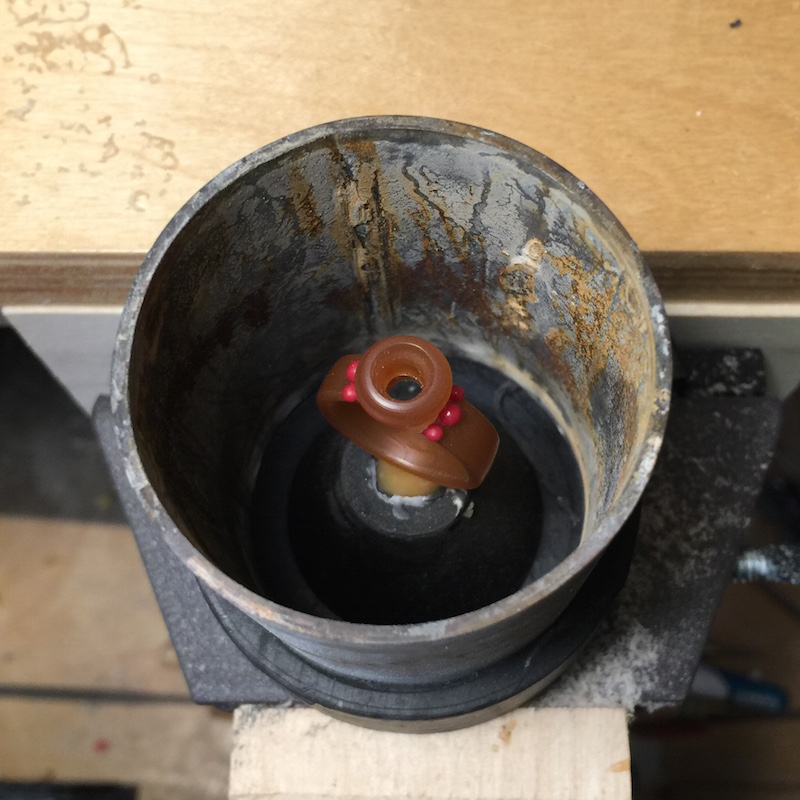
The bottom base shown on the last photo will fit onto a metal flask, which is a large stainless tube.  

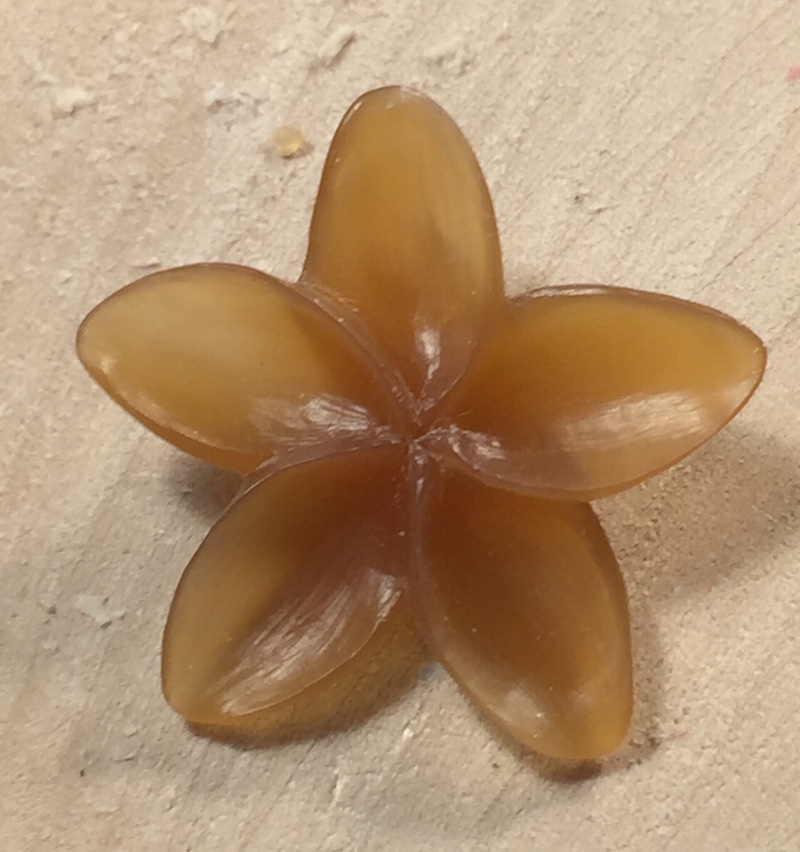
Next, spray the model with a light coat of debubblizer from about 12-18 inches away. Bubbles on the model will result in little bumps...you want to avoid them at all costs!

Using thin plastic, such as transparency material, create a "collar" at the top of the flask to contain the investment.

Step 2: Mix the Investment

The next step is to mix the investment, using the casting machine's vacuum chamber to remove any bubbles from the investment.

Using tables provided by the manufacturer of the investment, you carefully mix dry investment with cool water in a rubber mixing bowl. With plaster, you always add the dry plaster to water, and allow the water to seep into the dry mix...a process called "slaking." After the investment has absorbed water, you can start to mix. Kerr, the manufacturer of the investment, recommends mixing for about 3-1/2 minutes. I didn't go that long.

Step 3: Remove the Bubbles by Vacuuming

My first casting kit recommended tapping the side of the bowl to remove bubbles, but the Kaya-Cast has a vacuum chamber that lowers the pressure, causing the investment to "boil." Kerr recommends that once the investment starts to boil, vacuum an additional 20 seconds more. When the pressure is released, the bubbles disappear!

Step 4: Pour the Investment in the Flask and Vacuum Again

Carefully pour the investment down the side of the flask, never on the model itself. The investment will fill around the model from the bottom, which will help push any air bubbles to the top. Make sure that the investment is slightly below the top of the flask.

Place the flask in the vacuum chamber again, and vacuum up to 90 seconds. 

In the video, you'll notice that the sound of the vacuum is different. The bell jar was not sealing completely with the silicone pad. Pressing down on the jar fixed the problem, and since only a few seconds elapsed, I didn't have to adjust the time.

Step 5: Let the Investment Set

The next step is to let the investment set for about two hours. Once the investment has hardened, remove the collar, clean the top with a putty knife, making sure that the investment is slightly below the top edge of the flask.

Step 6: Removing the Rubber Base

Carefully twist (if possible) the rubber base, and remove it. If you can't twist it—these little suckers are pretty tight—pull one edge slightly away from the flask, then twist. It should come off. Inspect the hole to make sure that there isn't any debris.

If bits of investment get into the hole, they can become lodged in the molten metal and ruin your piece.

Step 7: Burn Out the Wax

Turn the flask upside down, and place on a metal screened based that's used for collecting wax and protecting your kiln. Using a kiln and the recommended burnout schedule from the investment manufacturer, burn out the wax. If you're using SatinCast from Kerr, the schedules are located here, or see the graphic below.

Since my flasks were 2"x2.5", 2.5"x2.5", and 2.5"x3", I should have used the five-hour burnout schedule. Larger flasks require longer burnouts. Since one of my flasks was larger than the 2.5"x2.5" limit for the 5-hour schedule, I went up to the 8-hour schedule. I probably could've done fine with the shorter schedule, or adjusted it a little longer.

I also saw that there was a large range of casting temperatures, which varies depending on the type of metal and the type of design. I was casting sterling silver from Rio Grande, which has a recommended range of 800-1200°F (427°C-649°C). I did read that centrifugal casting machines will generally cast at a higher temperature, and I know that a local studio casts at 900°F (482°C) with their centrifugal machine. There can also be problems with the quality of your casting if you cast too hot. So I chose to cast at 900°F.

So the final stage of your burnout cycle is to hold the flask at the casting temperature, which in this case was one hour at 900°F (482°C).

Kerr's recommended burnout cycle

Step 8: Calculate the Amount of Metal

Take the weight from Step 1 and make the following calculations:

  1. Add 10% for the button. Multiply the weight (or total weight of multiple pieces) x 1.1.

  2. Take the new amount, and multiple by the specific gravity of the metai you're casting. Silver is 10.36, but generally rounded up to 10.4.

  3. This is the weight in grams of your metal.

  4. Divide this number in half. You'll need at least 50% NEW metal (casting grain) and the other 50% can be scrap. Set the metal aside. Repeat for each flask.

  5. Turn on the scale, change mode to GRAMS. Place a small container on the scale and press the TARE button to zero out the scale. Add the casting grain first, and make sure that you have at least 50%. Add the rest of the scrap until you reach the total number needed.

Next...we'll cast!

a different take on wax with kate wolf

Wax model of flower for casting

Wax model of flower for casting

If you read my "About Me" page, you might have seen that my parents bought me a casting set when I was 18 as a consolation prize after a break up with my boyfriend—a kit that I still have today. Lost wax casting is a technique that's been around for thousands of years. A model is created from wax, placed into a type of high-temp plaster material, then the wax is burned out under high heat leaving a cavity, and molten metal is poured into the mold. When the metal has cooled, you have an exact replica of the wax model cast in metal.

But there was something I'd struggled with. I'd never learned anything about how to carve wax...or carve wax correctly.  Did you know that there are many types of wax available? Sure, I'd noticed that there were different colors, and I kinda understood that one wax seemed softer than another, but I was missing something. I just didn't get it. I'd bought every color of wax known to man, bought several books—including one expensive out-of-print book—but I'd gotten nowhere. Those colors were a mystery.

And I have the equipment. A Kaya-Cast vacuum casting setup. All 88 pounds of it, even hauling it back to Austin from Denver. Buying the right equipment is surely the key, right? Nope. Still missing something.

I bought dental tools, too...you know, in the olden days when your dentist actually made your crown, he used lost wax casting to make it. Some of the best instructions I'd found on the web were vintage videos on YouTube from the University of Michigan Dental School. I don't think they even use those techniques anymore.

Wolf Precision Master Carver's Kit 

Wolf Precision Master Carver's Kit 

Awhile back, I'd bought a set of beautiful Kate Wolf wax-carving tools, and piddled around with them, but still had nothing really worthy of casting. The blue wax seemed to smudge easily, but the tools were magical. The Wolf Precision Master Carvers kit contains well-made, quality tools...there had to be something I was doing wrong! I'd tried to get into a class of hers in Austin—to learn from the master herself—but they fill up quickly, so I couldn't get in.

And then the heavens opened up with an email from Creative Side Jewelry Academy in Austin. There was a cancellation in Kate Wolf's wax turning class. Turning wax on a lathe. I wasn't quite sure what I'd do with it, but it had to be good. I jumped at the opportunity. Heck, I even had a woodturning lathe. But supposedly there was no lathe needed, just a Foredom Flex Shaft, and I had one of those. I could sell the lathe on Craigslist to pay for the other things I might need.

Bezel ring turned on the lathe...

After a couple of blissful days turning in Kate's Class, I was a machine! I turned out ring after ring in wax. It was the perfect mix of technical and creative skills, and I was hooked. We made rings, bezels, and some people made little urns. We used those beautiful Wolf Tools to turn the wax. I learned it was more about lightly scraping than actually carving like you would with wood. Pieces were joined, then gaps filled with Touch-Up Wax, which was softer than the hard, golden Wolf Milling Wax. Fascinating. 

Then I got REALLY lucky. It was storming and there were floods in Central Texas. Someone couldn't make it to Kate's Figure Carving class and canceled! They made an announcement to the group, and I jumped at the opportunity to continue. It was the class I'd wanted to take for a long time. I was nervous, excited, happy...elated!

I had NO IDEA what to carve. Many people in the class came in with elaborate sketches and photos.  I settled for a flower. Kate had a great handout with flowers. I decided to go for something simple and pay a lot of attention to the details. One looked a little like a plumeria. 

Foredom Wax-Carving Pen Kit

So I started carving with a new-found appreciation and knowledge of my Wolf Tools. It was delicate work, shaving off tiny bits of HARD wax. Suddenly the different types of wax made perfect sense. When you needed to repair something, you used Touch-Up Wax, which melted at a lower temperature than the golden wax, so your wax pen didn't damage the underlying model. And I also learned that the Foredom Wax-Carving Pen that I owned and didn't like was actually GREAT! I had been using it turned up really hot, which was totally wrong. Lowering the temperature and understanding how temperature is used with wax made it perfect. And the small size of the Foredom makes it really handy to take while traveling.

Kate Wolf

Kate Wolf

Kate Wolf is an amazing teacher, and I learned a great deal from her in the classes. If you're struggling to understand wax carving, or even someone who learned wax carving a long time ago, you could learn a lot. Not only is she a masterful teacher, but damned entertaining. She has the most hilarious stories and will keep you entertained throughout the class. I could only smile the other day when I noticed my Wolf Tools has a sticker on the container that says "Warning: Some of these tools are WICKED sharp!" Being from Maine, she says "wicked," and maybe some other words that make you giggle, a lot. :-)