I’m pleased to let everyone know that here shortly I’ll be introducing my new full-length ZBrush jewelry course at www.zbrushjewelry.com. If you’re interested in being notified when I go live, sign up here.

and now for something completely different...rendering??
So earlier this week I made the mistake of downloading the trial of something called Keyshot. Here’s the deal…when you model something in ZBrush, or any basic CAD program, it doesn’t look like a photo. If you watch those home shows on HGTV, they’ll show a CAD drawing of the home, but it’s not until later that they show the fancy, more-realistic view. That’s an extra step that can take a lot of time and some expensive hardware and software. And that’s how movie studios get realistic animated creates…they’re all RENDERED, adding some photo-realism.
(click to enlarge) Using Nanomesh in ZBrush as a test to make a pavé ring…
I had heard that ZBrush has a partner in crime when it comes to making that photorealistic stuff…but I also heard it was almost $1800! For “real” jewelers who sell expensive jewelry, they probably don’t bat an eye at that price. But for someone making casual lifestyle jewelry, that’s almost as much as a 3D printer.
I knew the need was there, though, so I started researching while working on my ZBrush course. I tried Blender, which is free, but OMG…it made my head hurt. Maybe Keyshot was more user-friendly? (Hint: It’s almost a religious debate among CAD folks…) Might as well know something about it. That was a mistake…I’m hooked. Do I really ever have to physically make jewelry again? This CAD thing is SO MUCH CLEANER! I’ll just look at my stuff on the screen and imagine I made it. But I guess that’s cheating future archeologists!
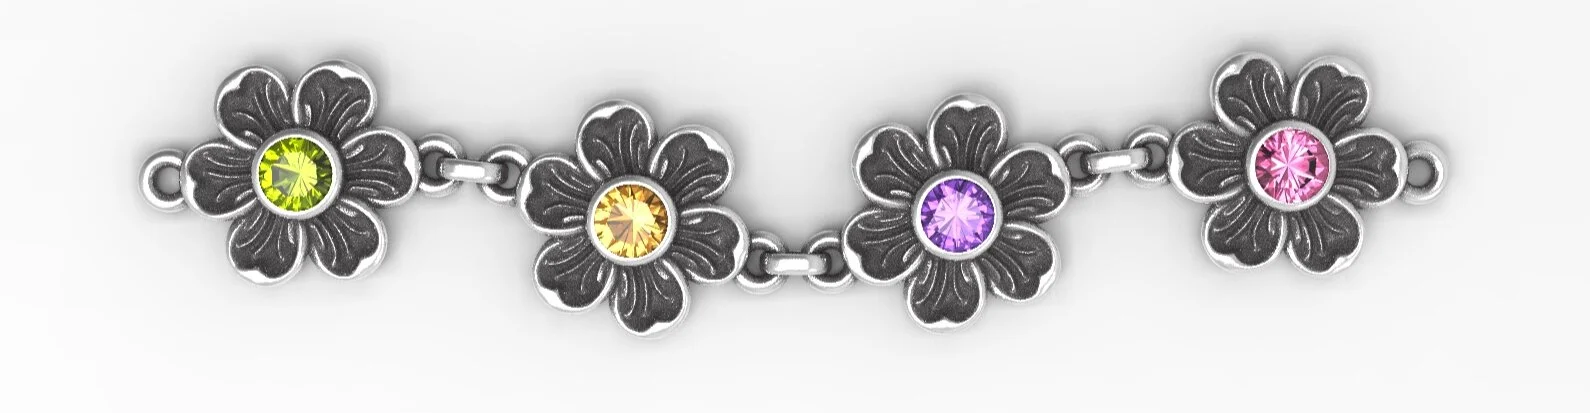
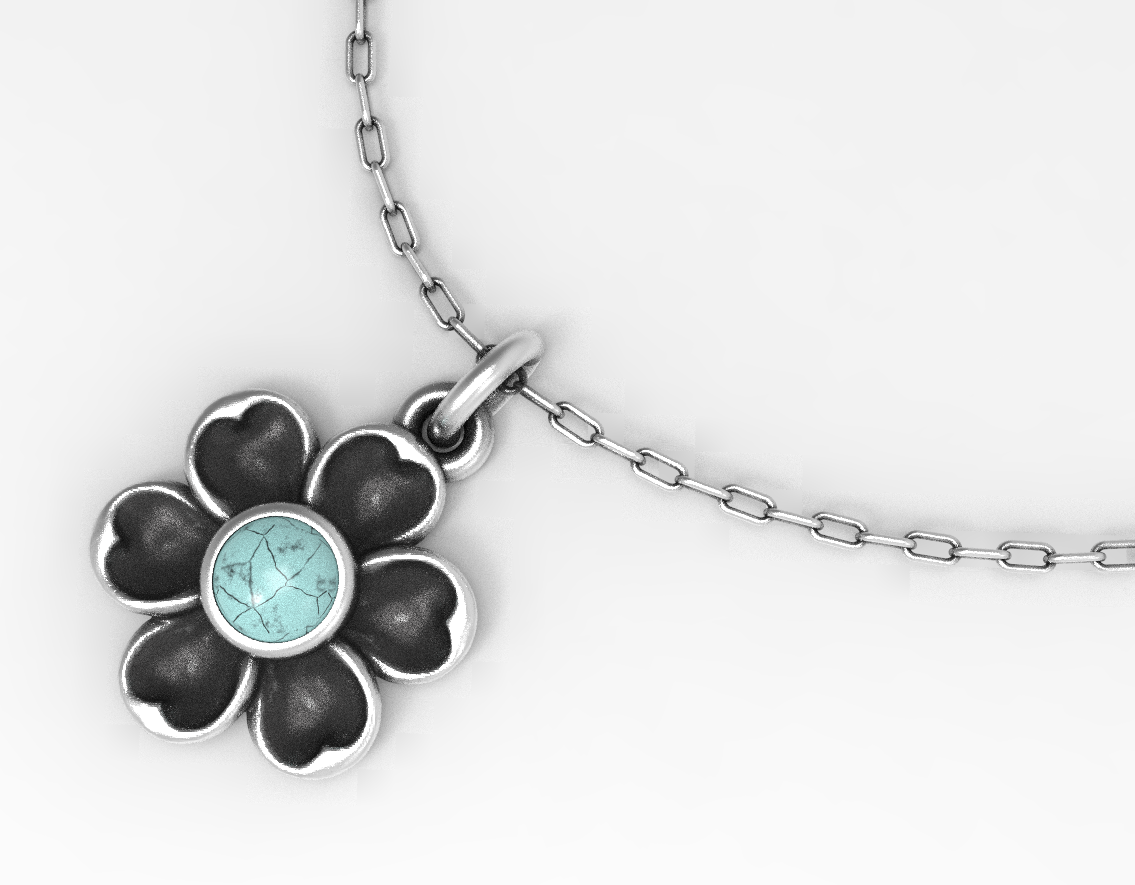
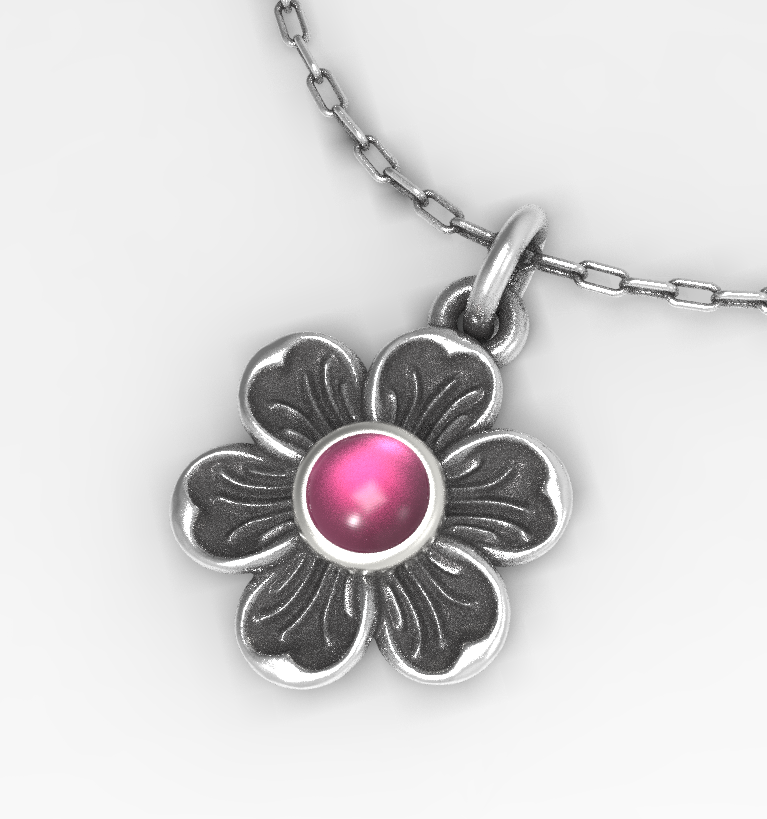
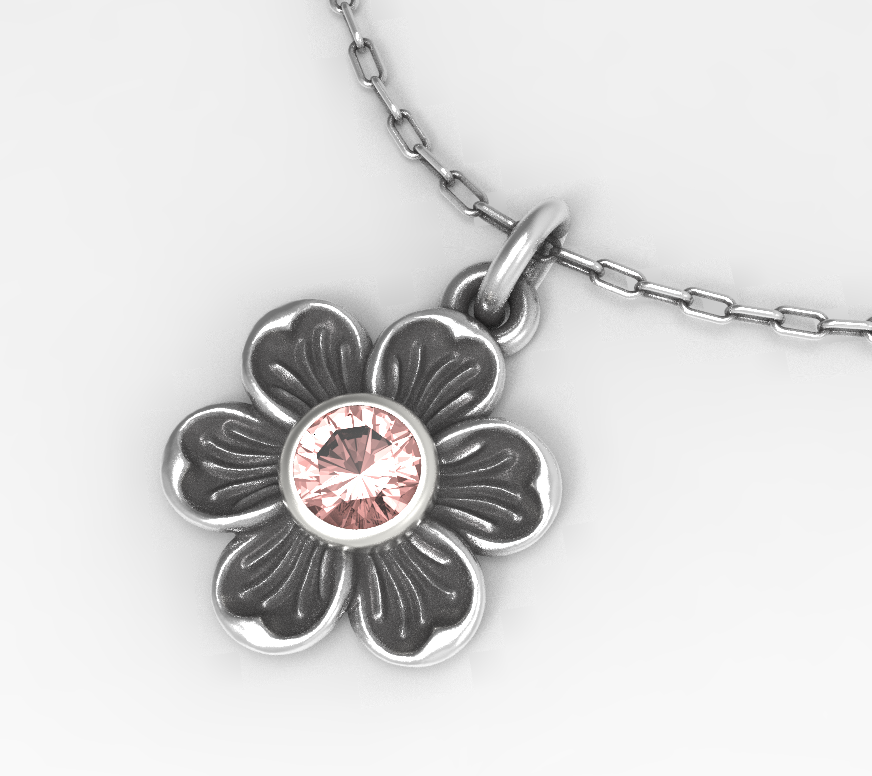
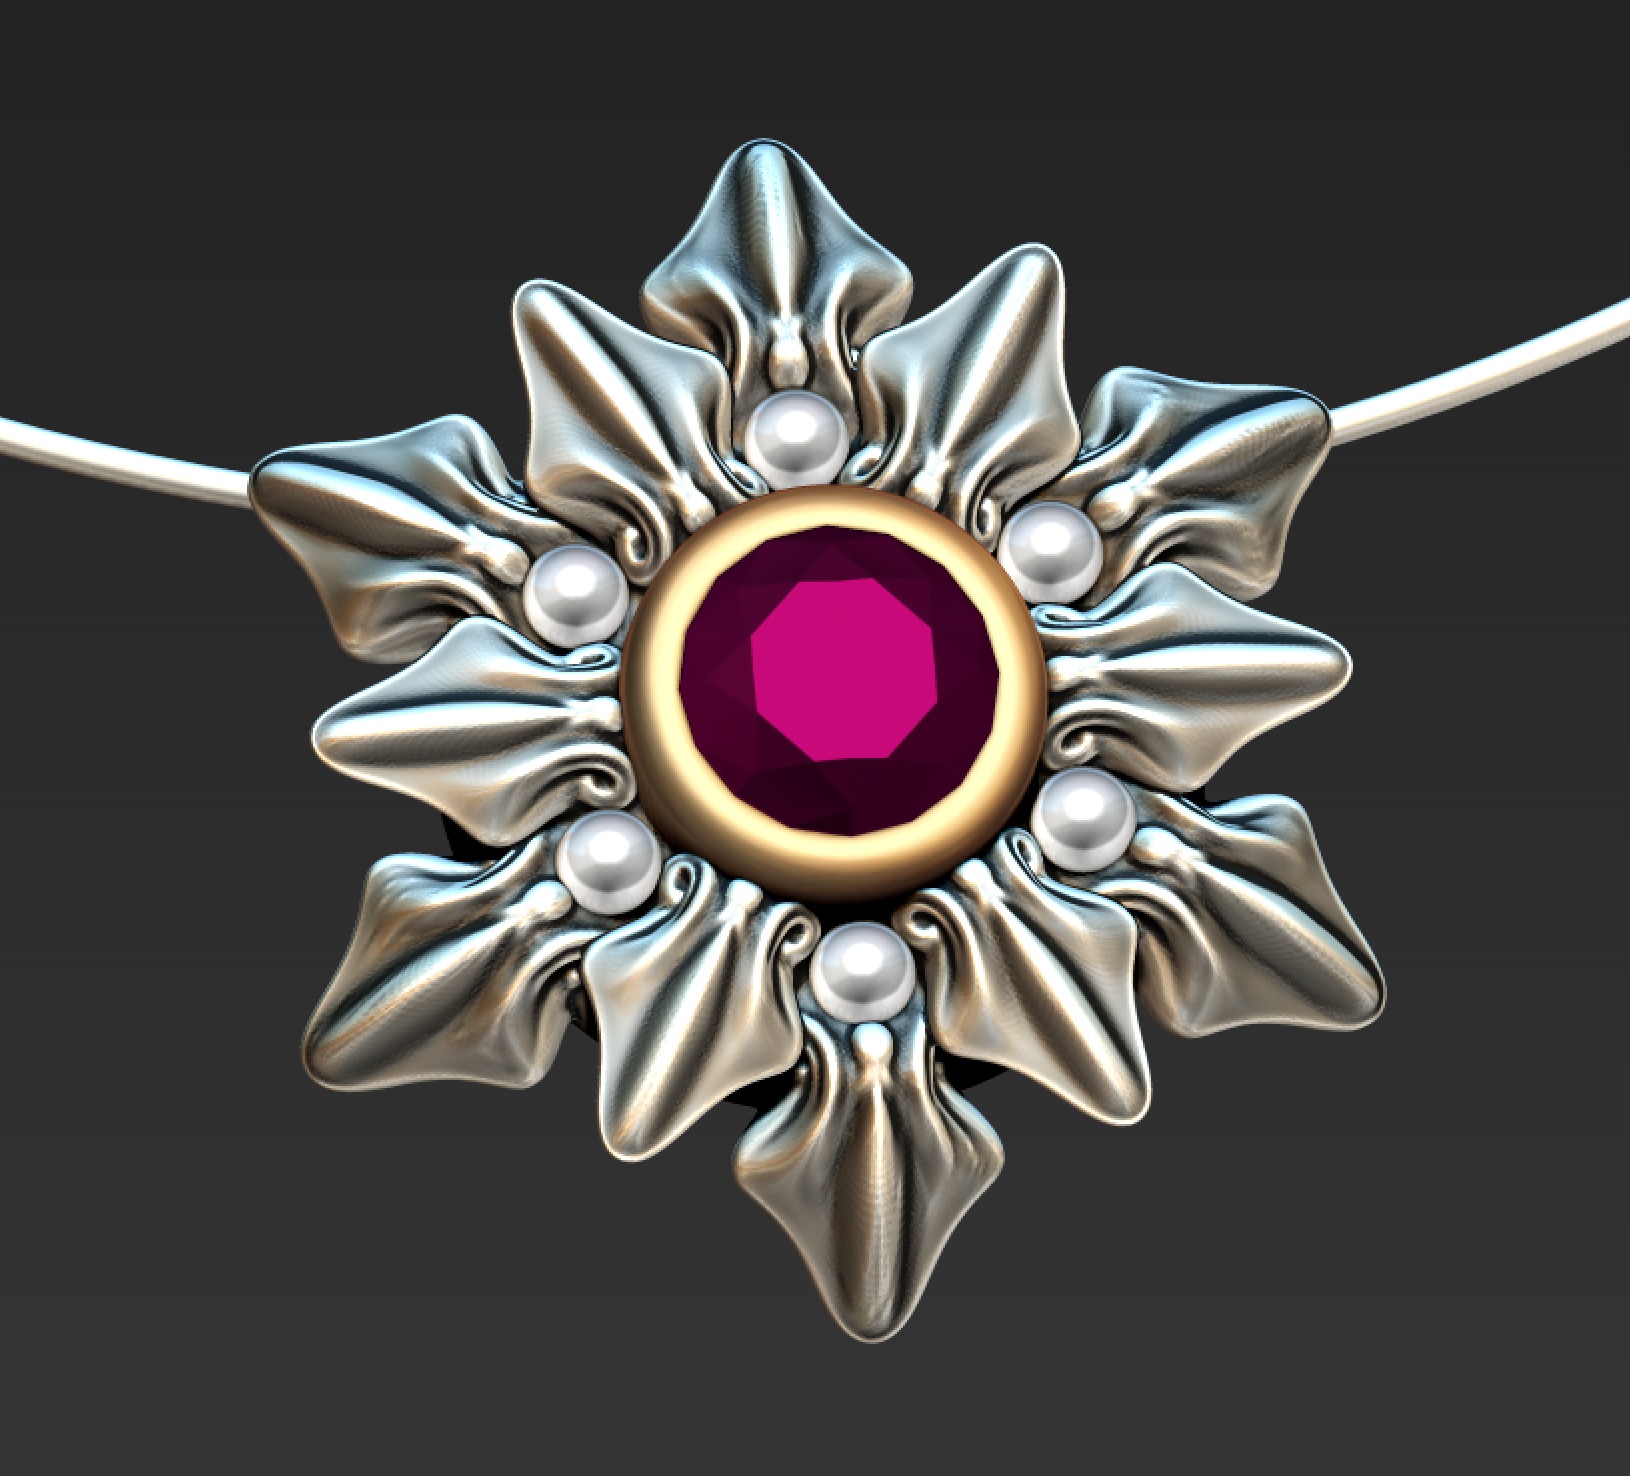
So here’s the interesting part. That cute little start to a bracelet above? It’s not real. I modeled it in ZBrush and rendered it in Keyshot. It does not exist in a physical form. How will we know what to believe anymore??
Anyway, I realized that I got the price wrong, and that there is a version specifically for users of ZBrush that’s $200, then there’s something called the ZBrush to Keyshot Bridge that costs another $149. At least I’m hoping that’s what it costs. I MUST have this. Forget designer shoes!
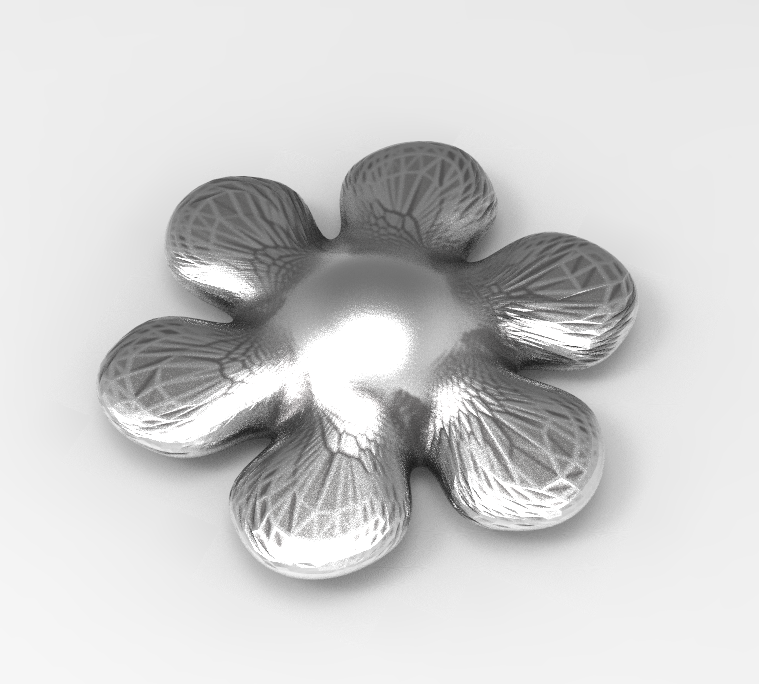
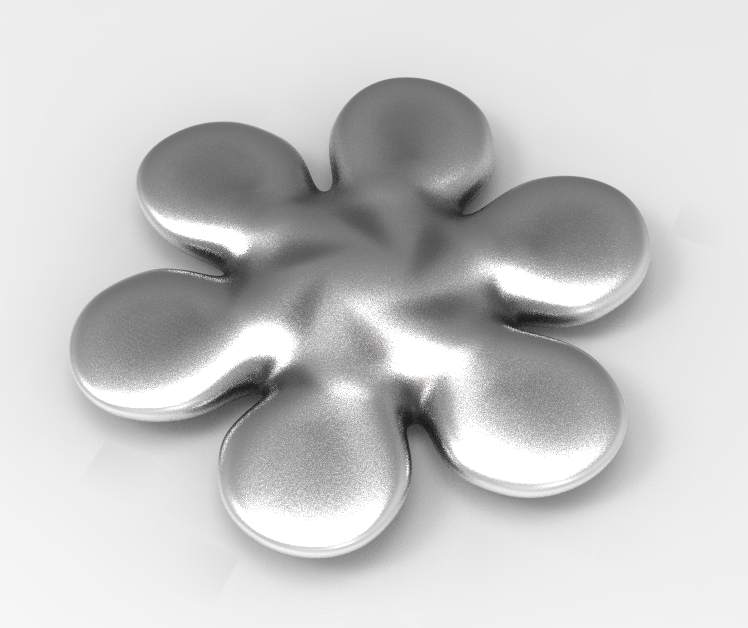
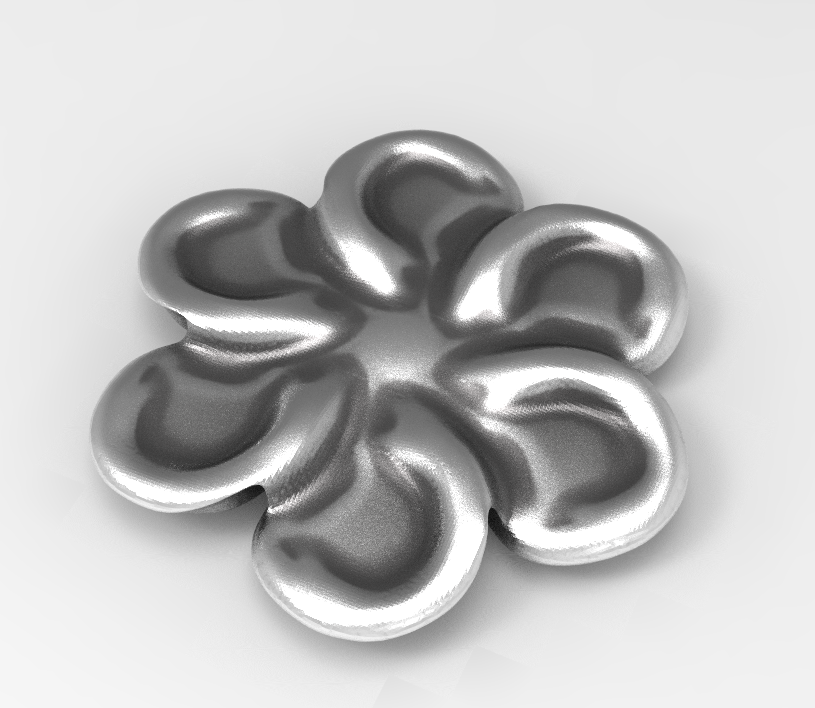
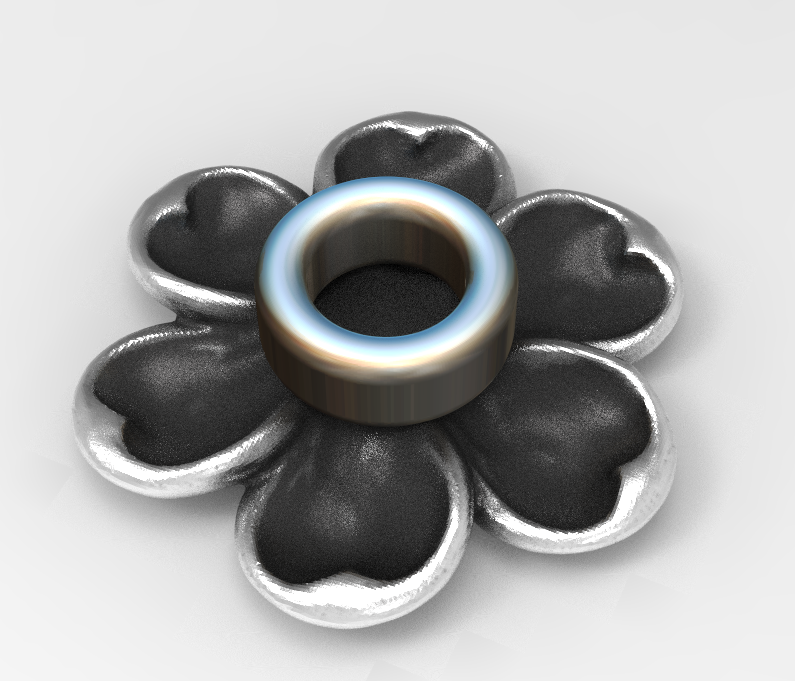
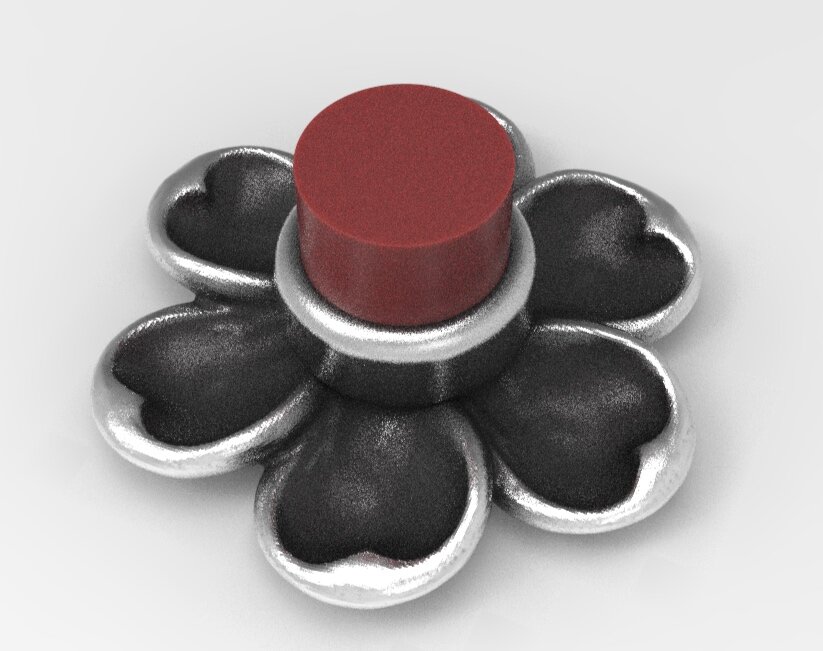
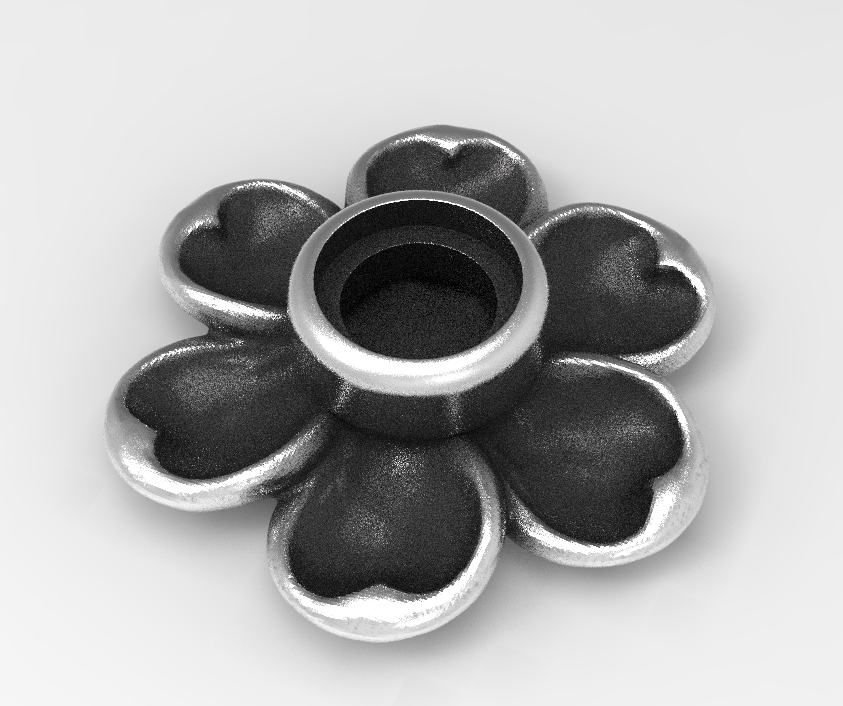
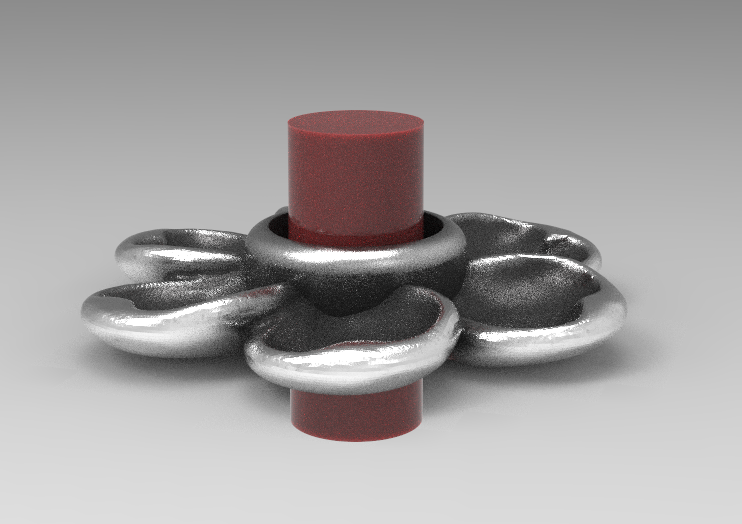
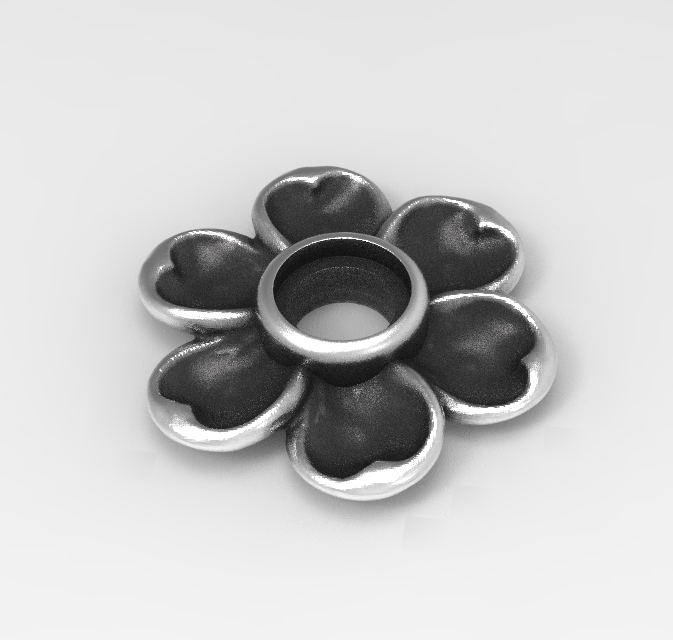
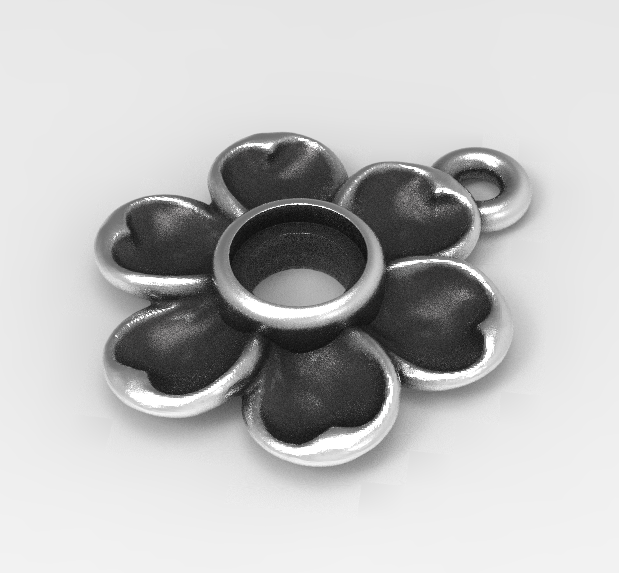
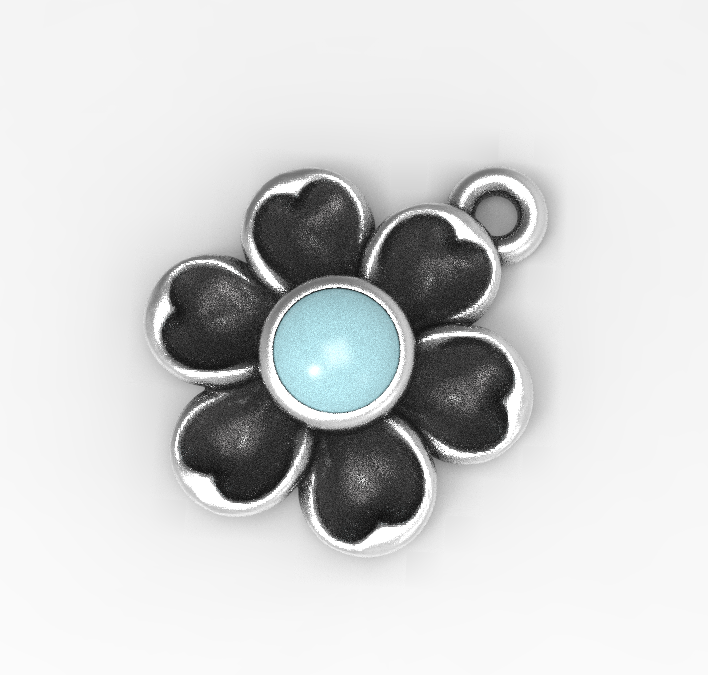
And it’s super late…like 2:47 a.m. on a Saturday, but I couldn’t stop rendering things…anything I could get my hands on. So I thought you might enjoy seeing the process of making a flower charm. It will be in my upcoming ZBrush course.


Anyway, I’m signing off. Time to actually go to bed.
a new fun ZBrush tool...VDM brush and my origami snowflake
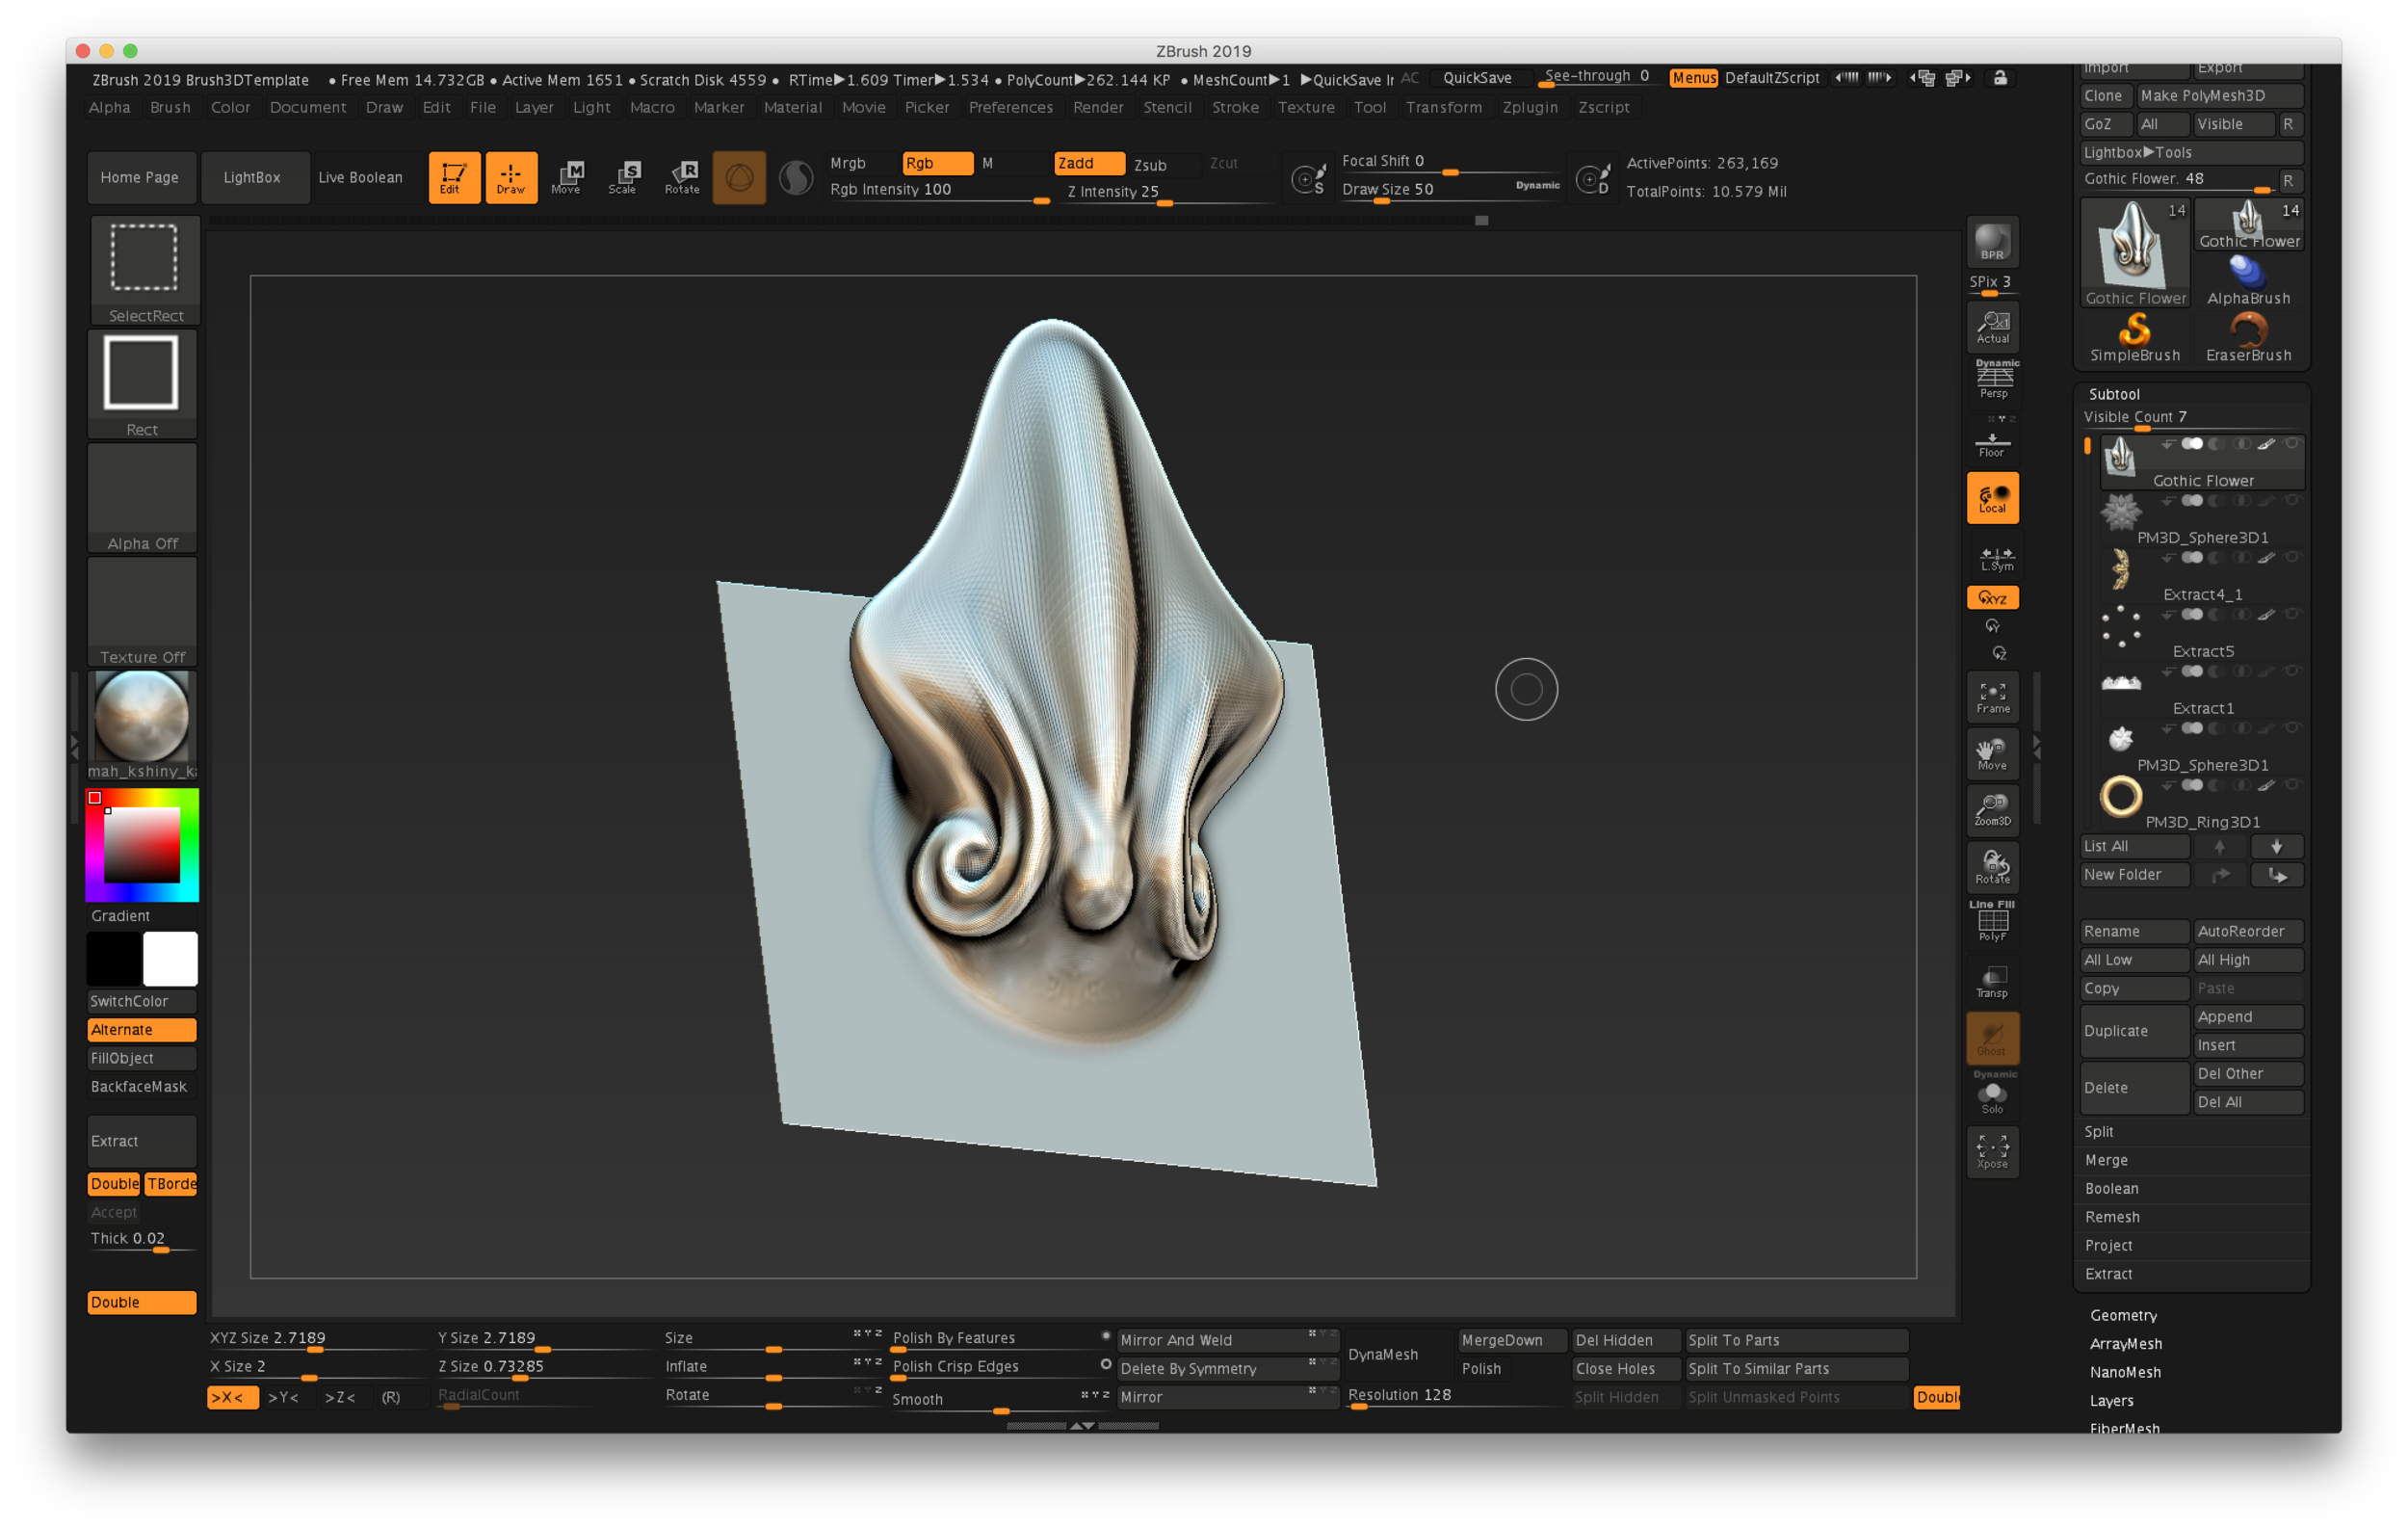
I’d seen something pretty cool in ZBrush but had forgotten what it was called…there is a “brush” that allows you to apply objects to a surface and blend them in. One of the great built-in tools is a set of facial features, like noses, eyes, mouths, even some horns if you were creating some movie monsters.
I had seen it used for scales, and it allowed for features to overlap. Tonight it was my mission to find out how to make my own!
One of the best resources available for ZBrush artists is #AskZBrush. Most, if not all, are done by a very talented ZBrush expert named Joseph Drust. Not only are his videos clear and easy to follow, but his voice is very mellow…I could listen to him all day! So after a quick search for a tool that I had no idea what to call, sure enough, one of Joseph’s hundreds of videos covered the topic: the VDM Brush.
An example of a custom VDM brush in ZBrush
Template is here!
It’s an offshoot of something called a Chisel brush in ZBrush, and the #AskZBrush tutorial on this technique was a great place to start. Within the Lightbox, under Misc, there is a file called Brush3DTemplate.zpr. It’s a starting place for creating your own pattern, using a Plane3D primitive. The template includes the Plane3D with multiple subdivisions, so all you have to do it sculpt something using your favorite brushes while keeping the edges intact—don’t take your design all the way to the edge.
I used the Snakehook brush (Shortcut B-S-H), with the Inflate brush (B-I-N), and the Clay Buildup brush (B-C-B). If your mesh looks a little faceted, simply switch to a higher subdivision (press “D”). If you “lift” the design up off the surface, then there will be room for the design to overlap other instances, creating depth.
Notice also that since we’re using a Plane primitive, the back is open…this model has no real thickness.
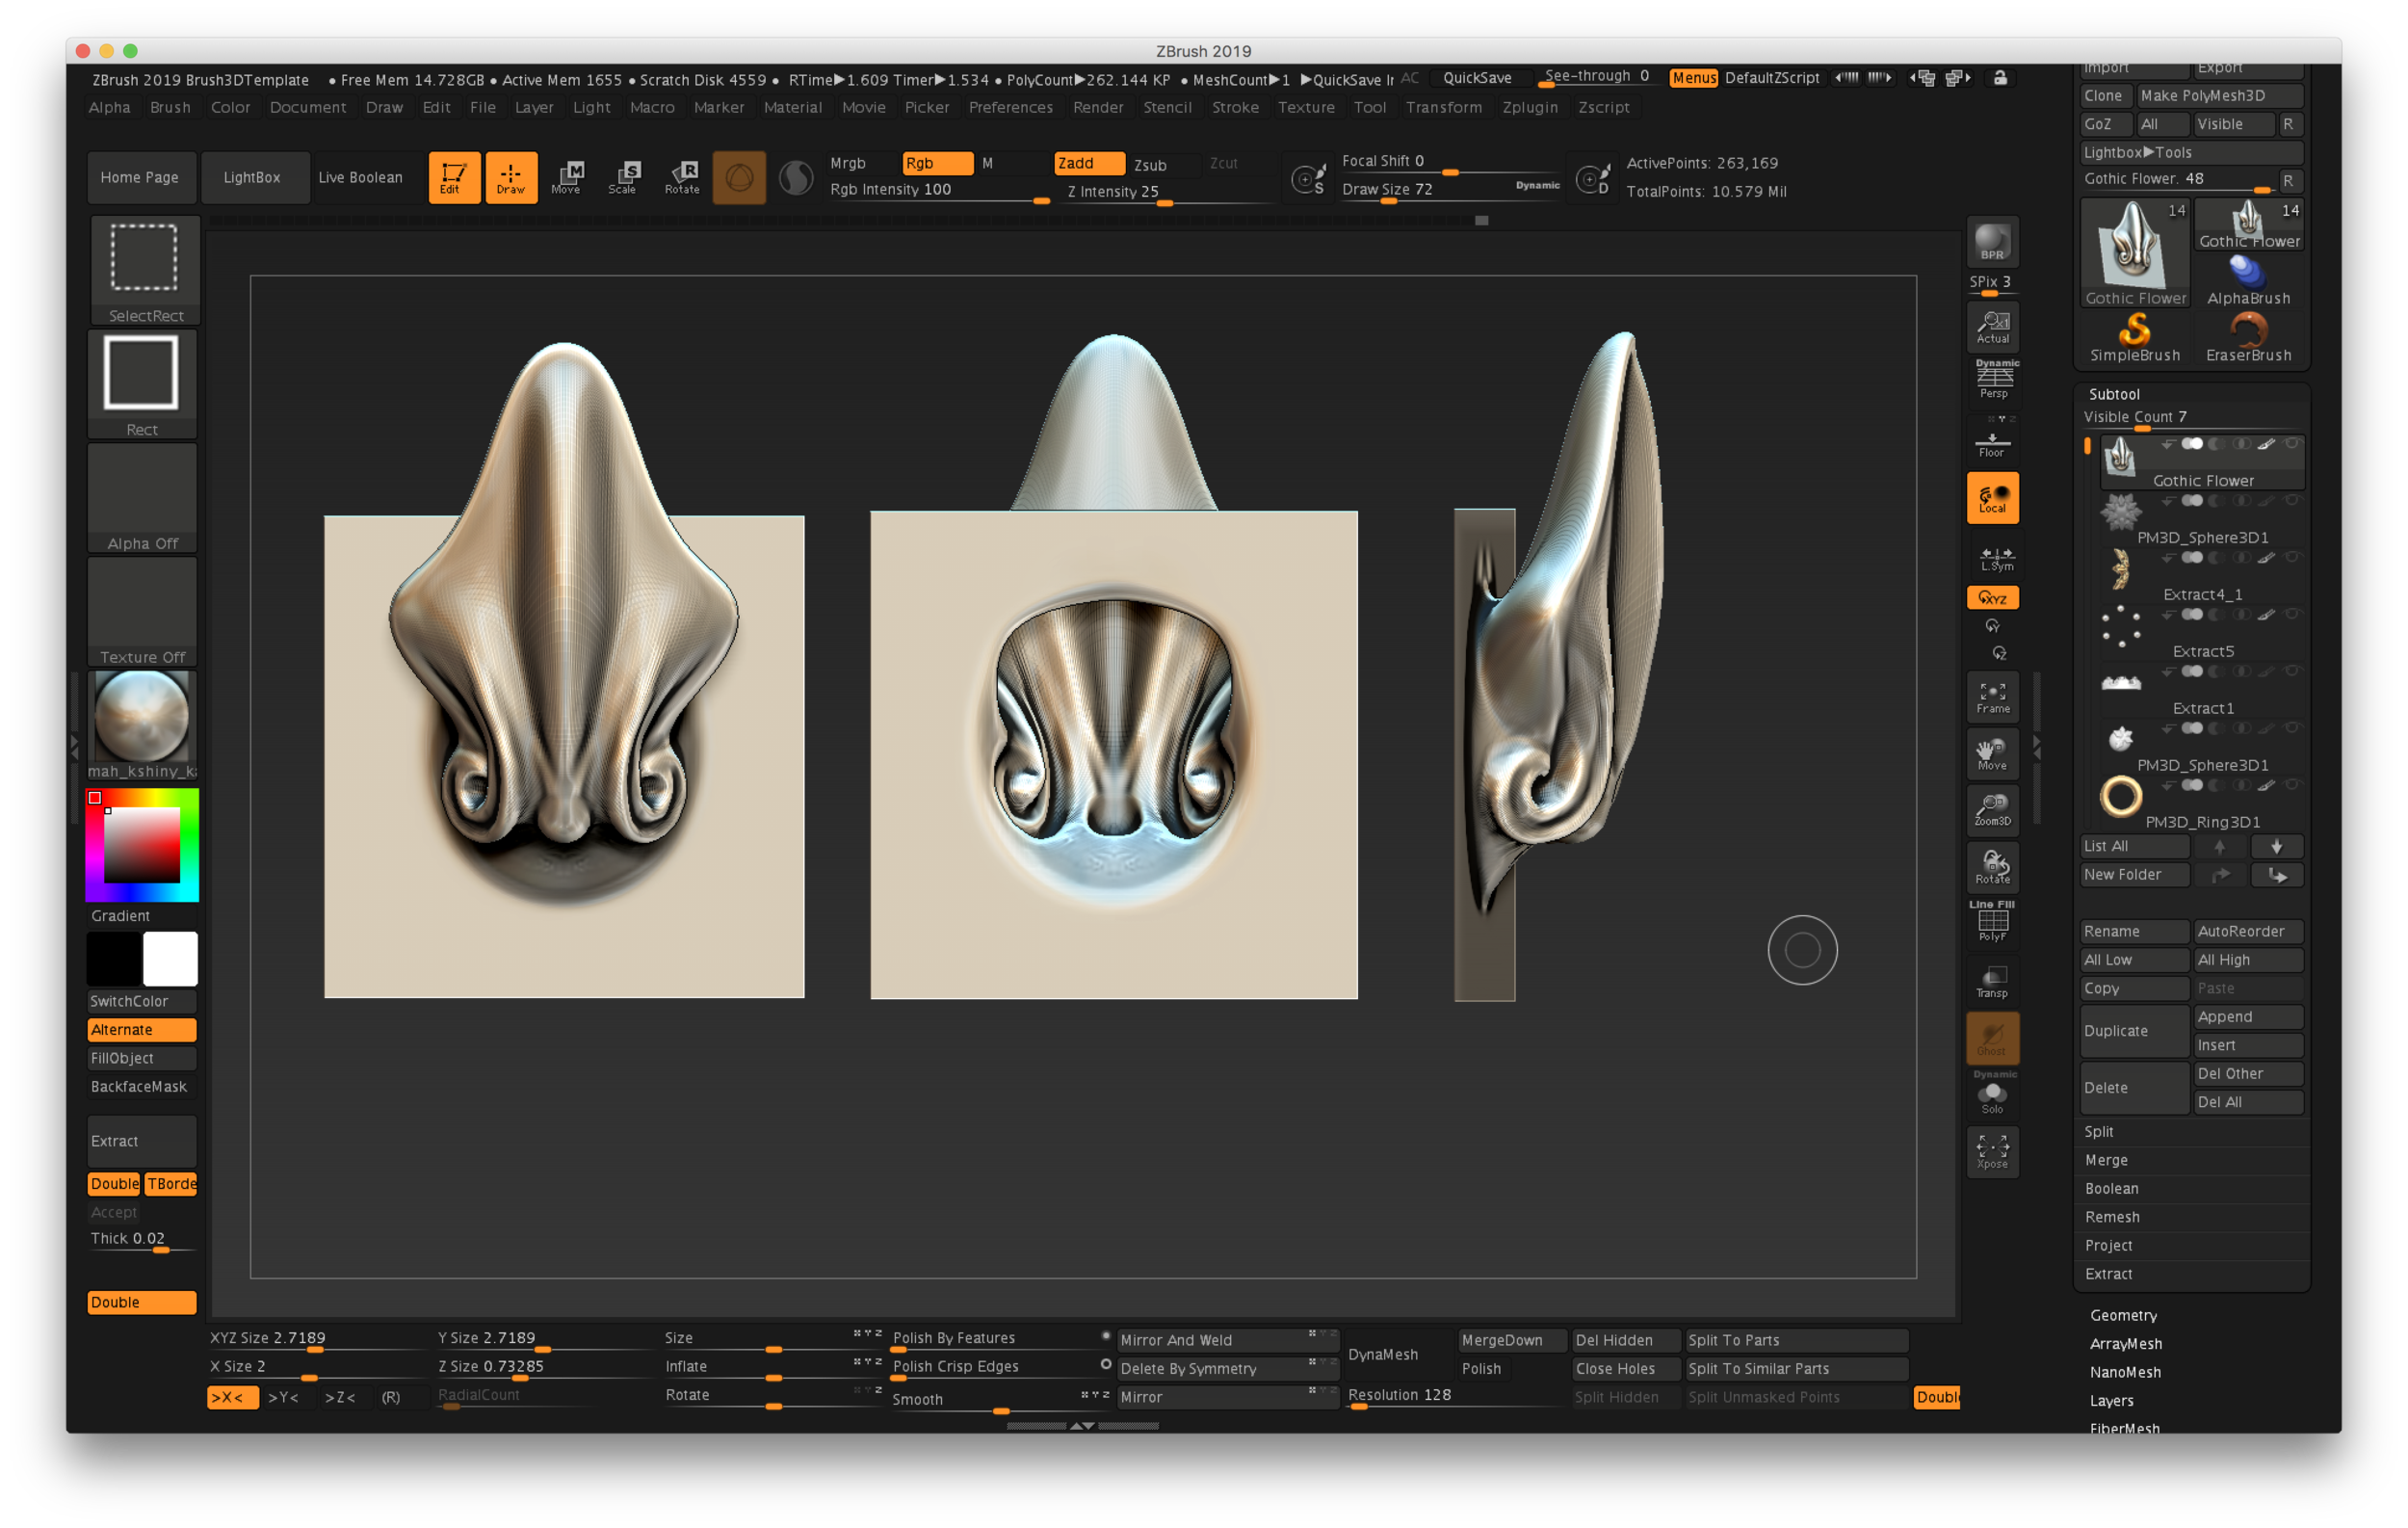
Three views of the new brush…shows the hollow back and side view
Anyway, I’d recommend that you watch the video for all the details, but I can see all sorts of possibilities here. On my sample model, I used half a sphere with radial symmetry, applied the “leaf,” then added a bezel and some “pearls.” The back is hollowed out, which is something I’ll show more about in my upcoming course.
It looks a little like an origami holiday snowflake to me!
cost of printing @ Shapeways
I had a really great question from a viewer on my YouTube channel yesterday on the flower eternity band tutorial—how much would it cost to have the ring printed and cast? There are several factors that can affect the overall cost, like the thickness of the band and the type of metal. I wear a similar band to this one, and mine is 1.5mm in thickness and it has never bent out of shape.
I’d only sent models out to Shapeways very early in my ZBrush exploration, and even then I’d only had waxes made. So I had no idea what the answer to this question was…so I created a new ring and got it ready for Shapeways. Mind you, there are other great services out there, but Shapeways has a large variety of materials available.
I decided to add a bezel setting to mine with a hole that’s smaller than the stone. I’ll use setting burs and a hammer handset on my Foredom to bezel set the stones. Creating a bezel with a smaller hole gives me flexibility on my stone size. Here are a couple photos of the model in ZBrush:
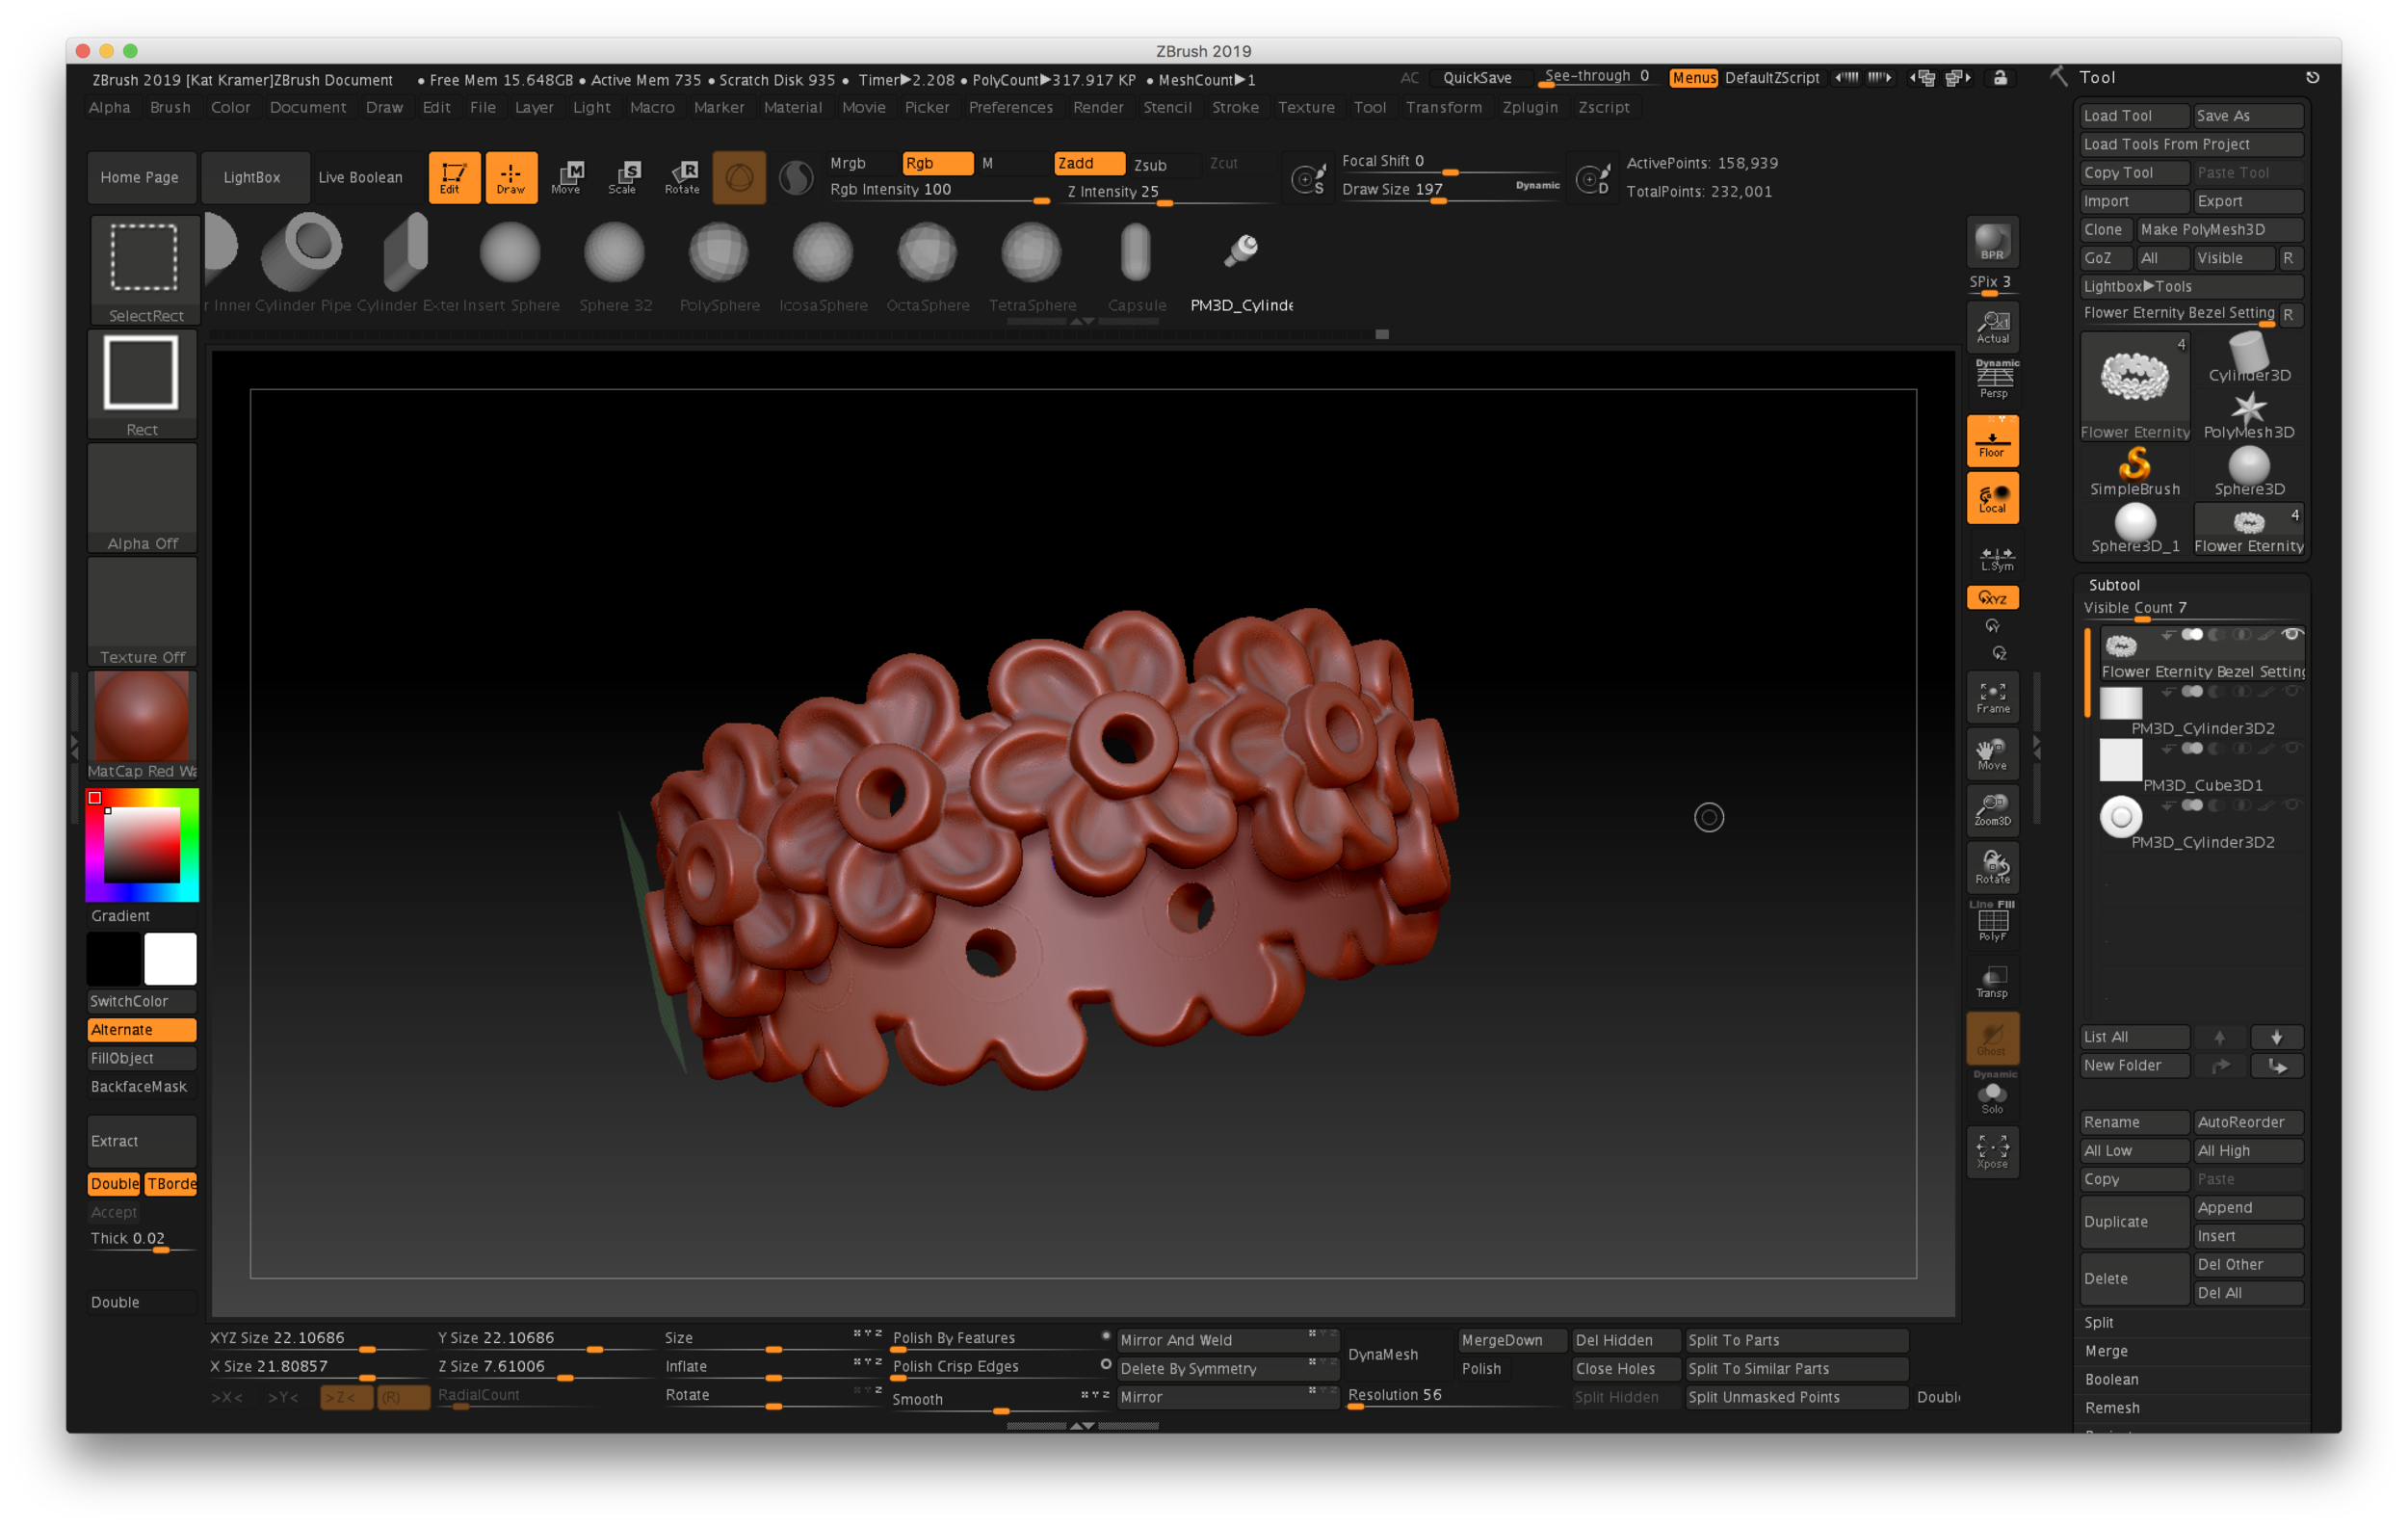
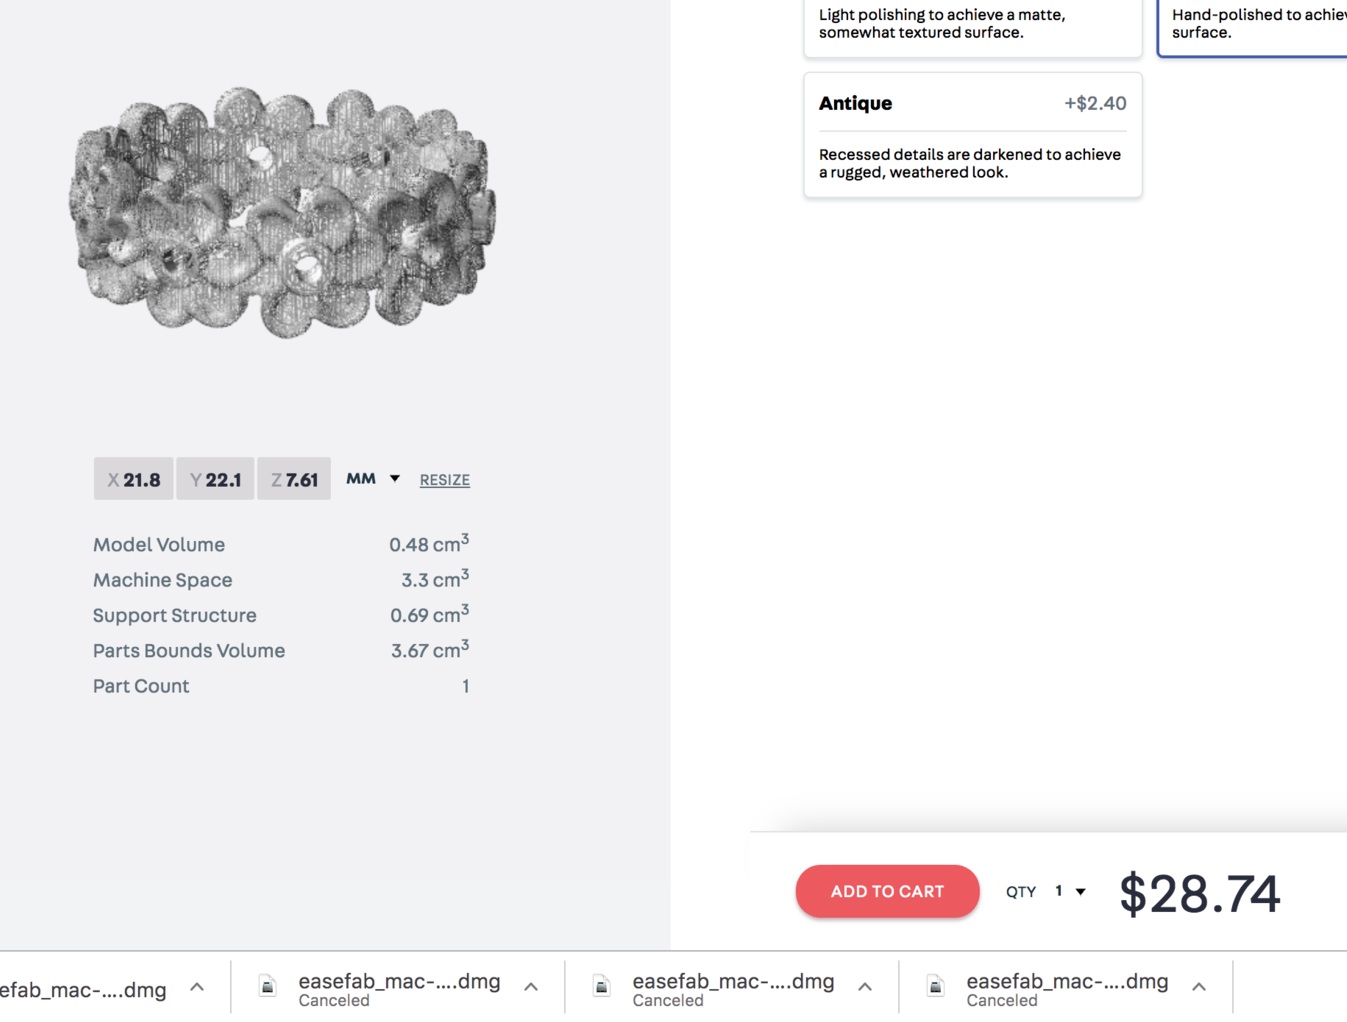
After creating the ring and resizing it to the desired thickness and ring size, I used Decimation Master to lower the overall file size and simplify the mesh. My ring is around a women’s size 8 US.
Make sure that the model you want to export is all in one Subtool—in my model, I had both the bezels and the flower band which needed to be permanently merged. I used Merge Down and re-Dynamesh to an appropriate resolution, which for full-sized rings in the method I use is a resolution of around 56-80. Then I went to the Plugins menu, and located Decimation Master. I always make a mental note of the ActivePoints above the canvas. Mine started out around 780,000 points.
This process has two steps…because you’re only exporting one Subtool, you only need to use Pre-process Current. That step will take a little bit of time, depending on the size of your model and number of ActivePoints. Once you’re done, the ActivePoint count will not change.
Special note about those ActivePoints: I tend to work with models that are a million points or lower…some artists have high-end hardware and love to work in the 12-20 million point range, but since I primarily work on a MacBook, and I hate waiting for my computer to process things, I learned how to work in lower resolutions.
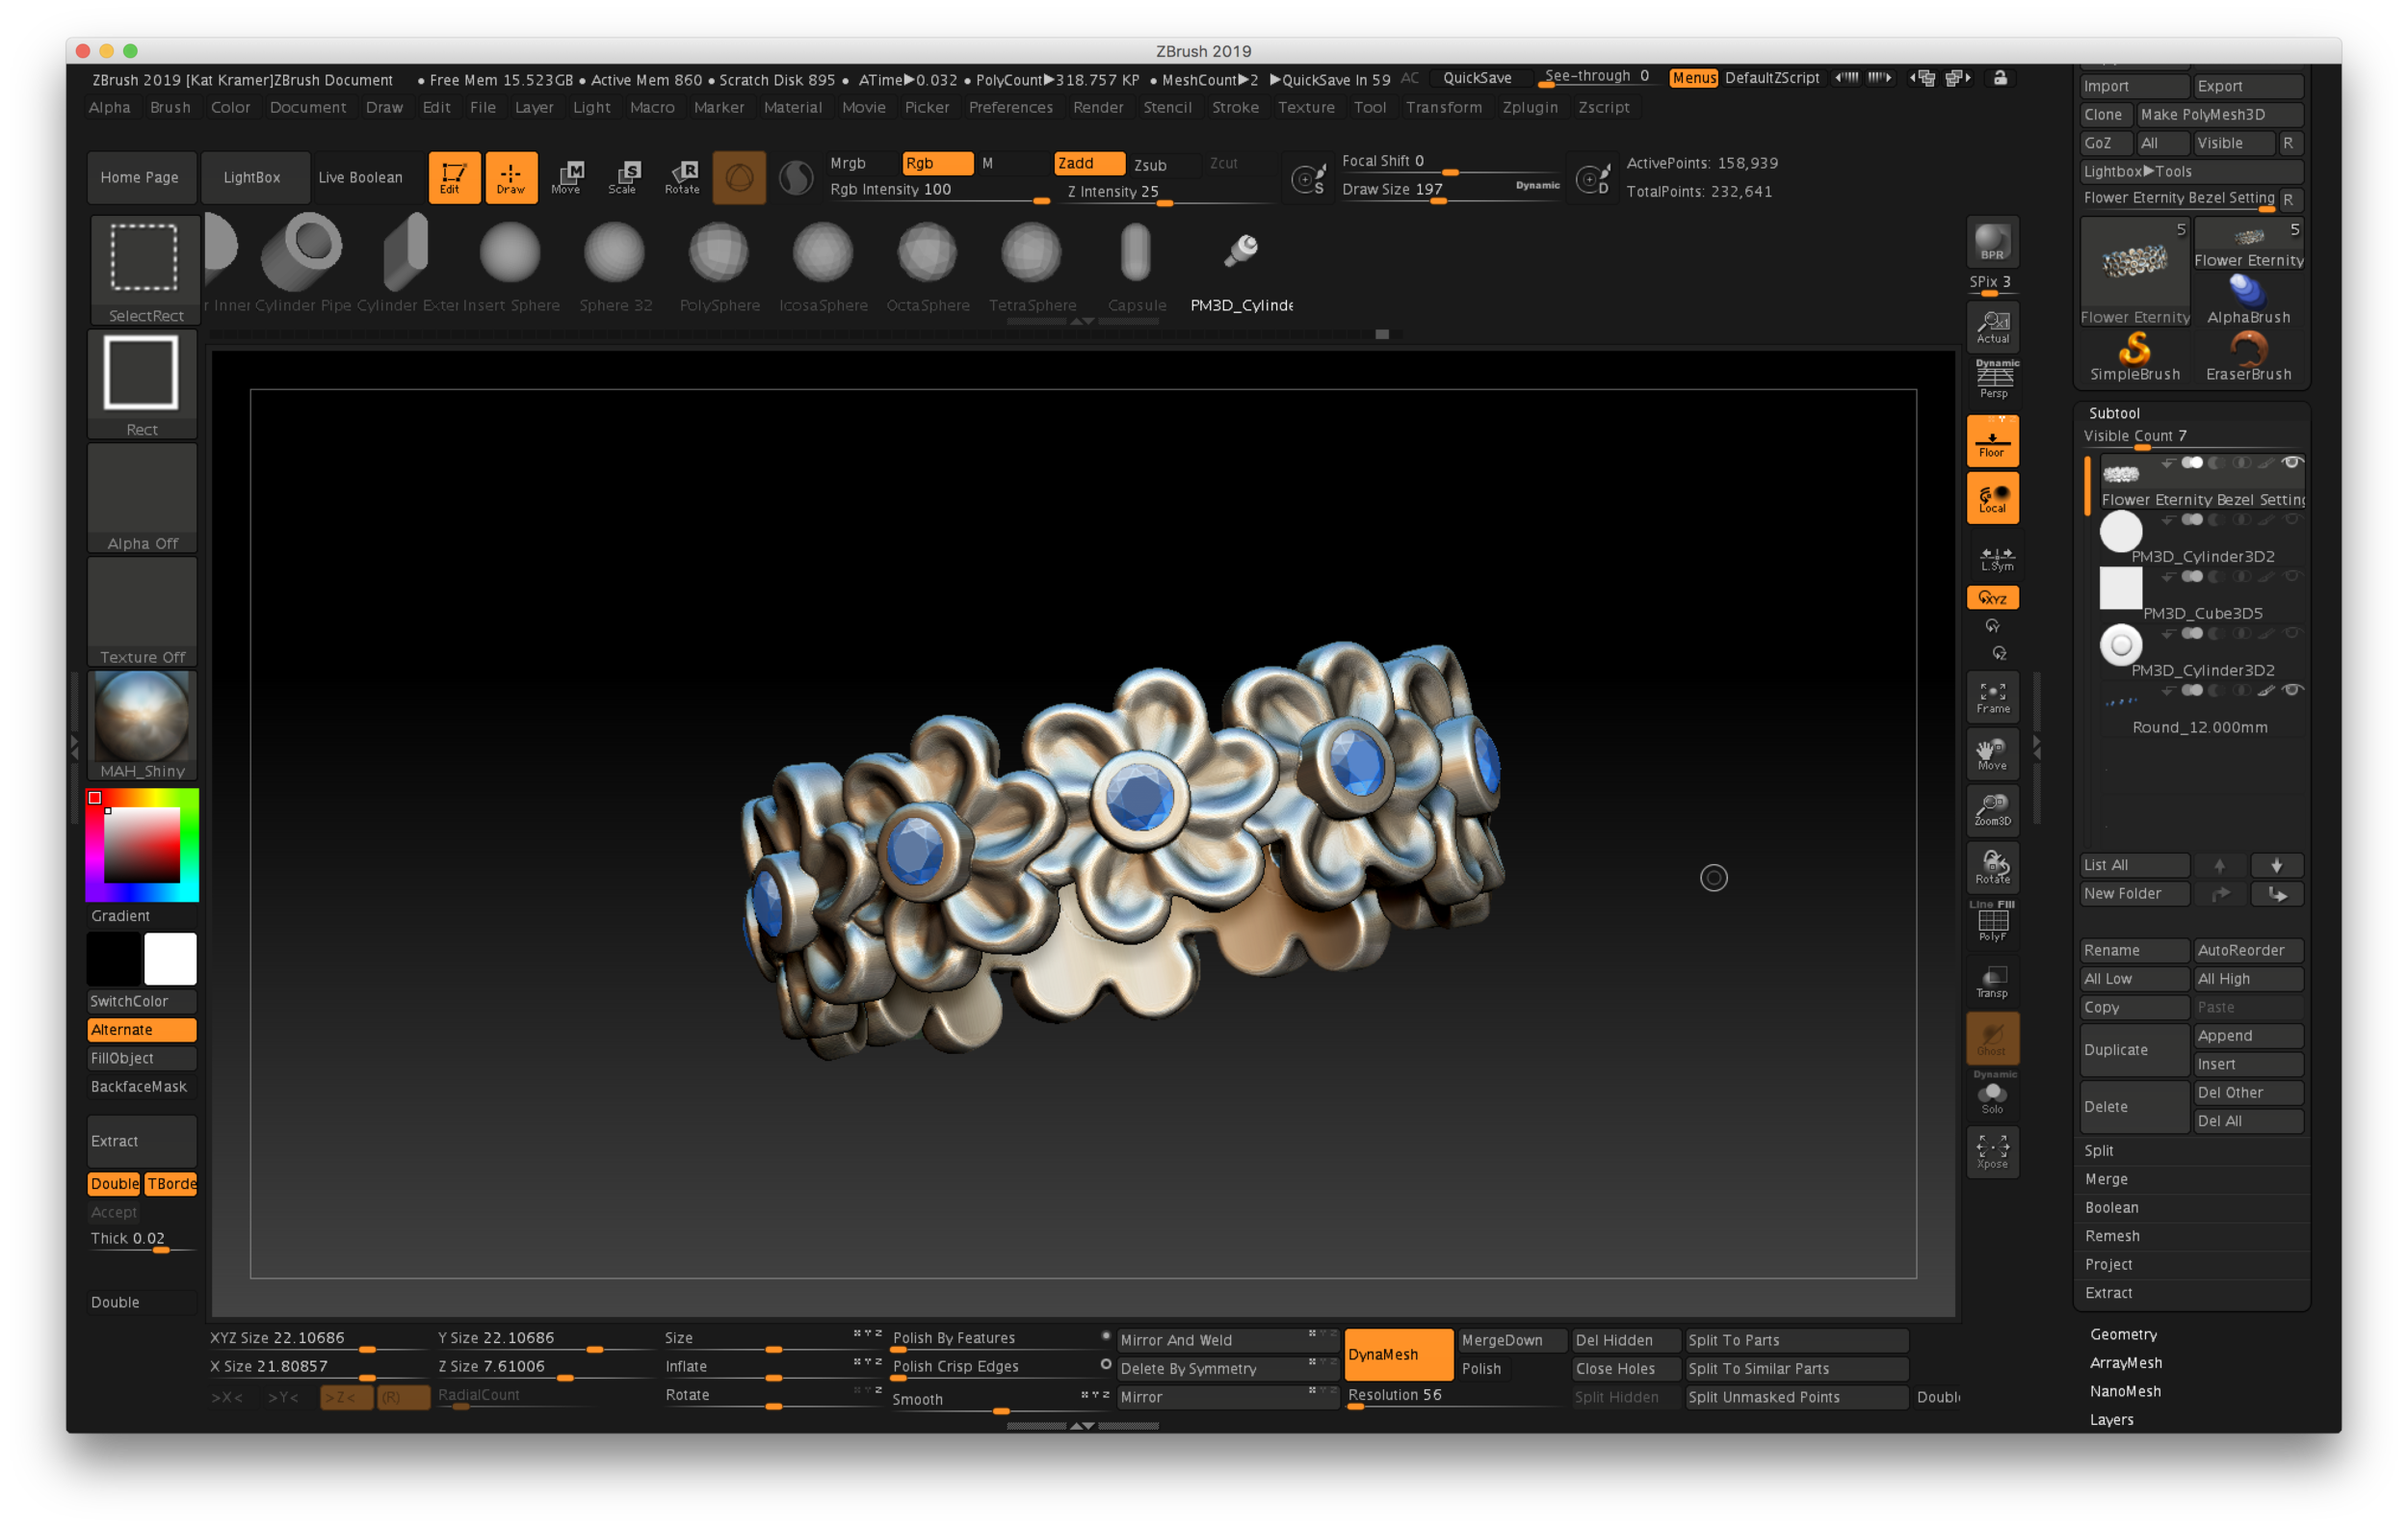
The second step is to Decimate Current, and this is when you will see a change in the ActivePoints. Once the operation was complete on my model, the ActivePoint count dropped down to 158,000, which is a smaller, more efficient file. It’s easily uploaded to Shapeways by using the Export command in the Tool palette.
It looks like Shapeways has recently changed their landing page, so you can quickly upload a model and select a metal preference. You can also choose the type of finishing—rough, polished, or finely polished. There is an upcharge for those extras, though.
So the answer to the question if I were printing this design would be about $24-35 to print in sterling silver. Although I love wearing this ring so much I’d happily shell out $283 for a gold version!
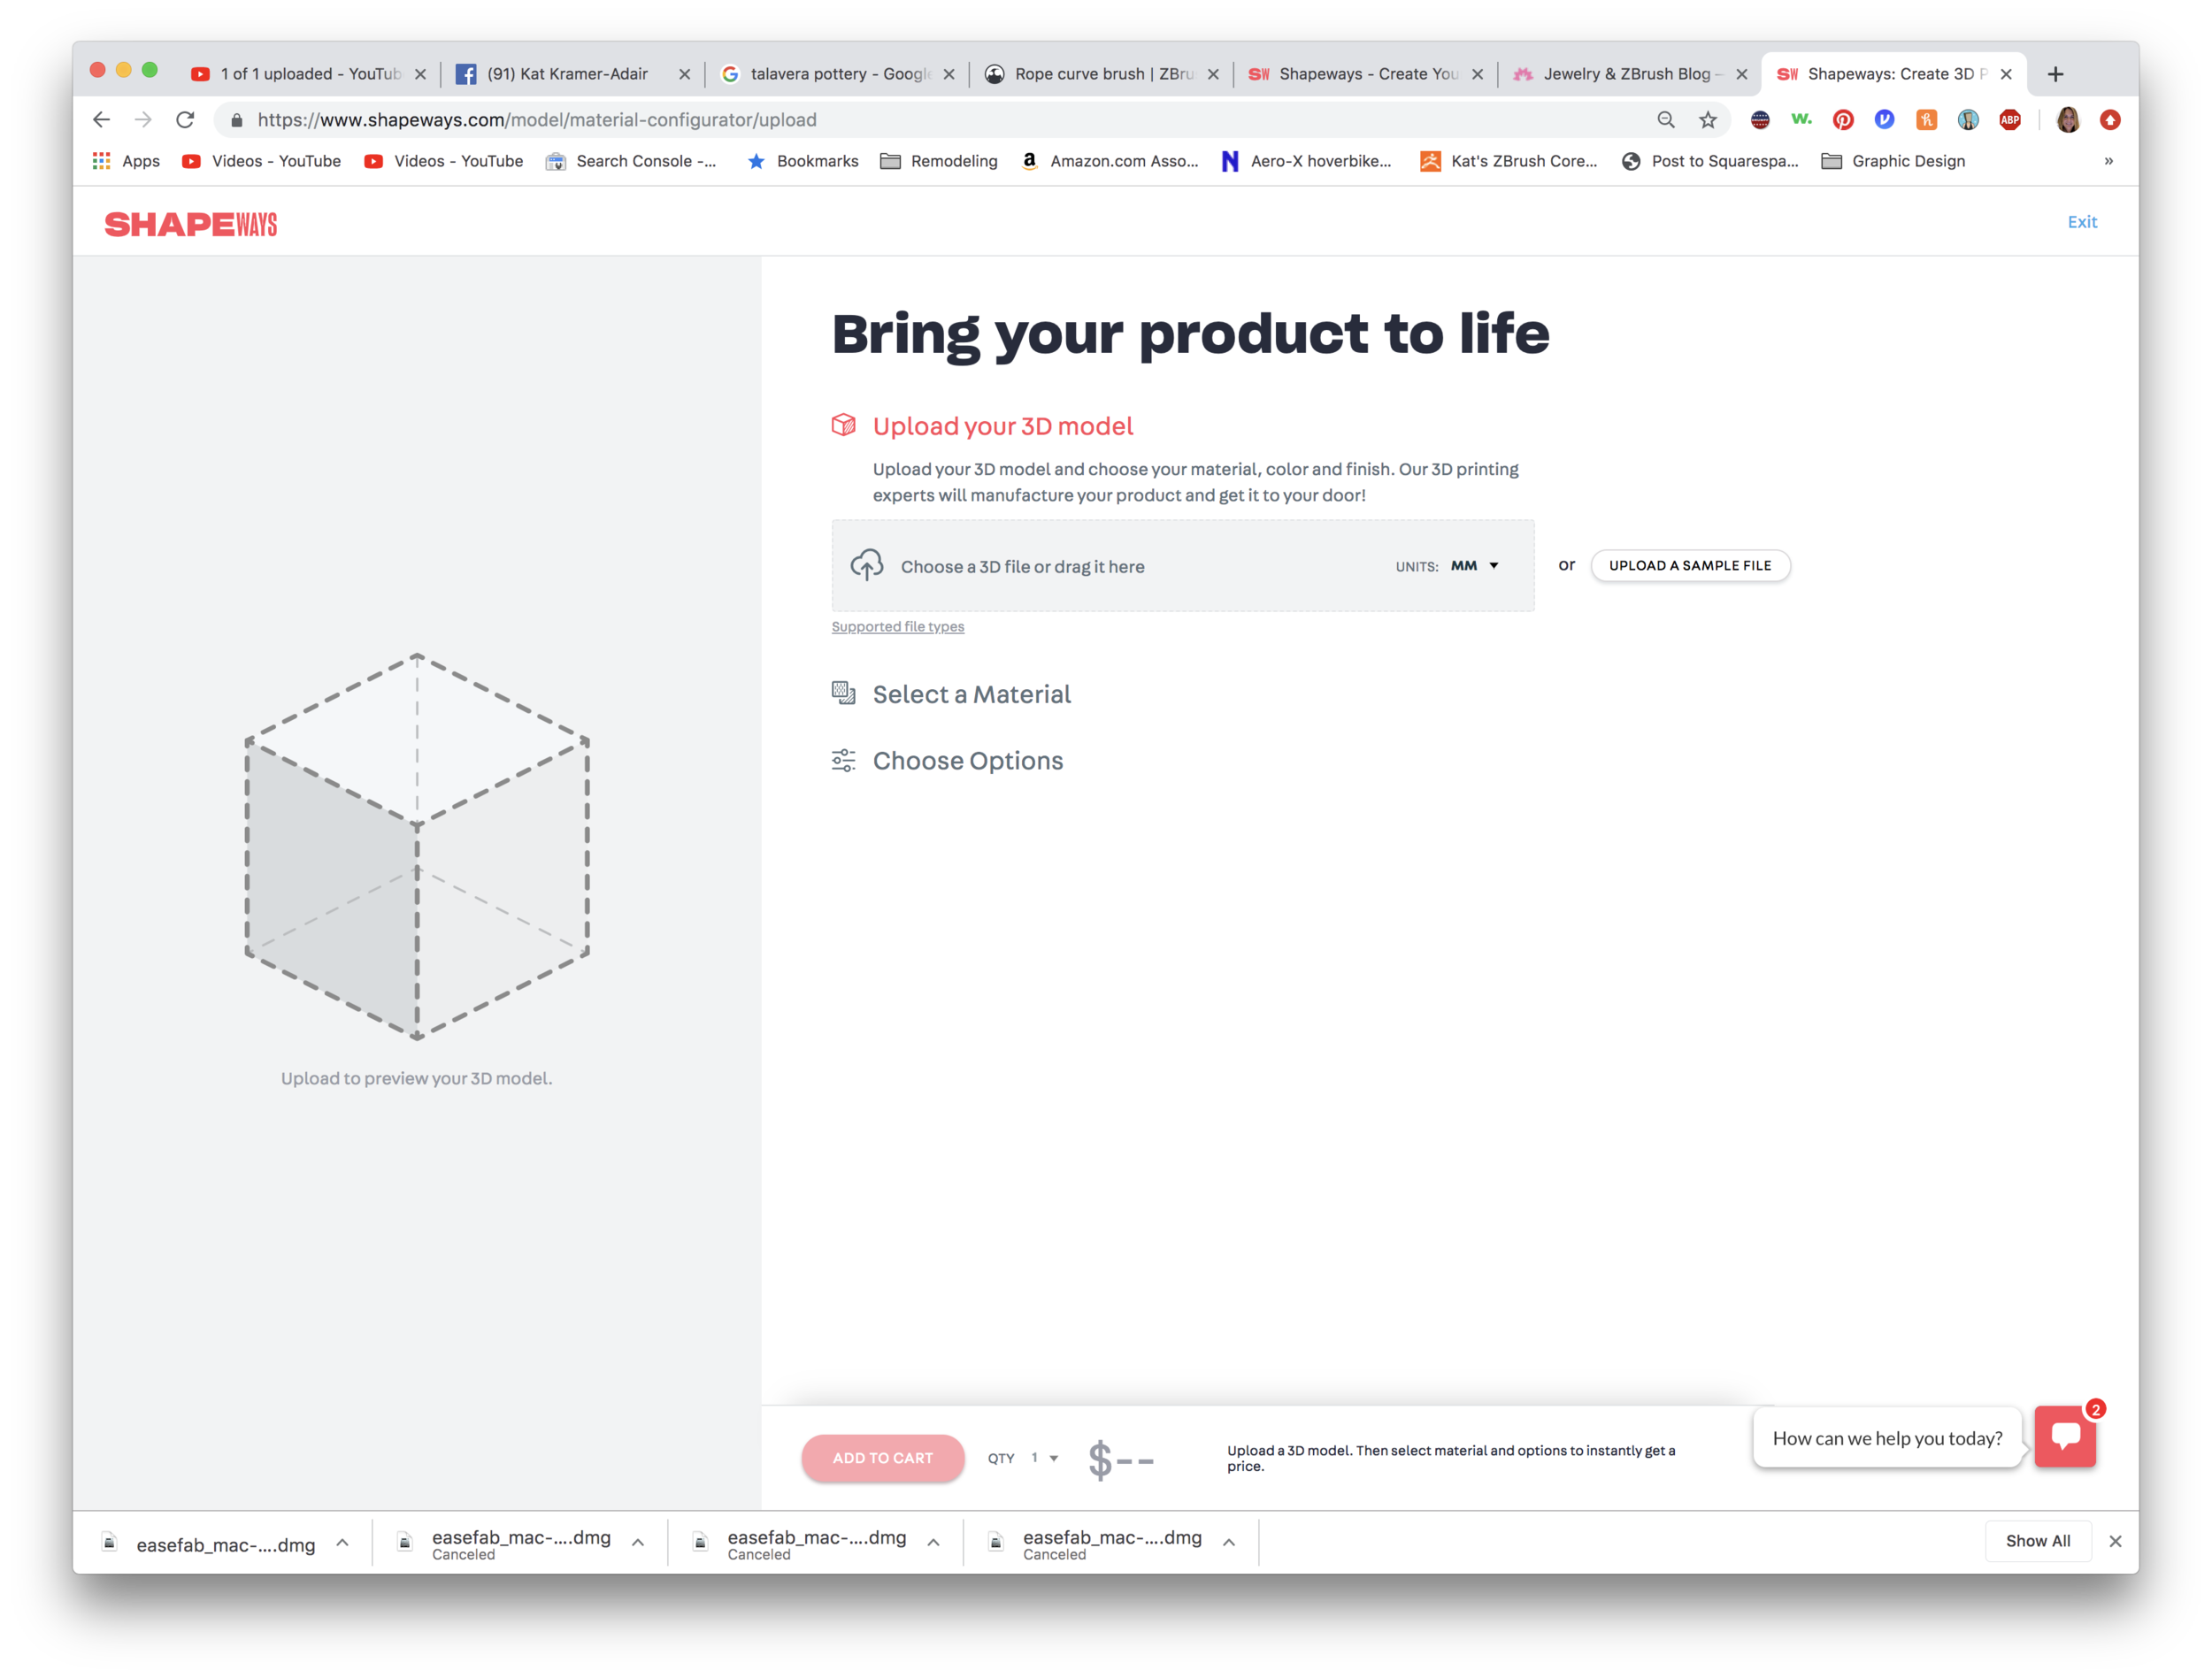

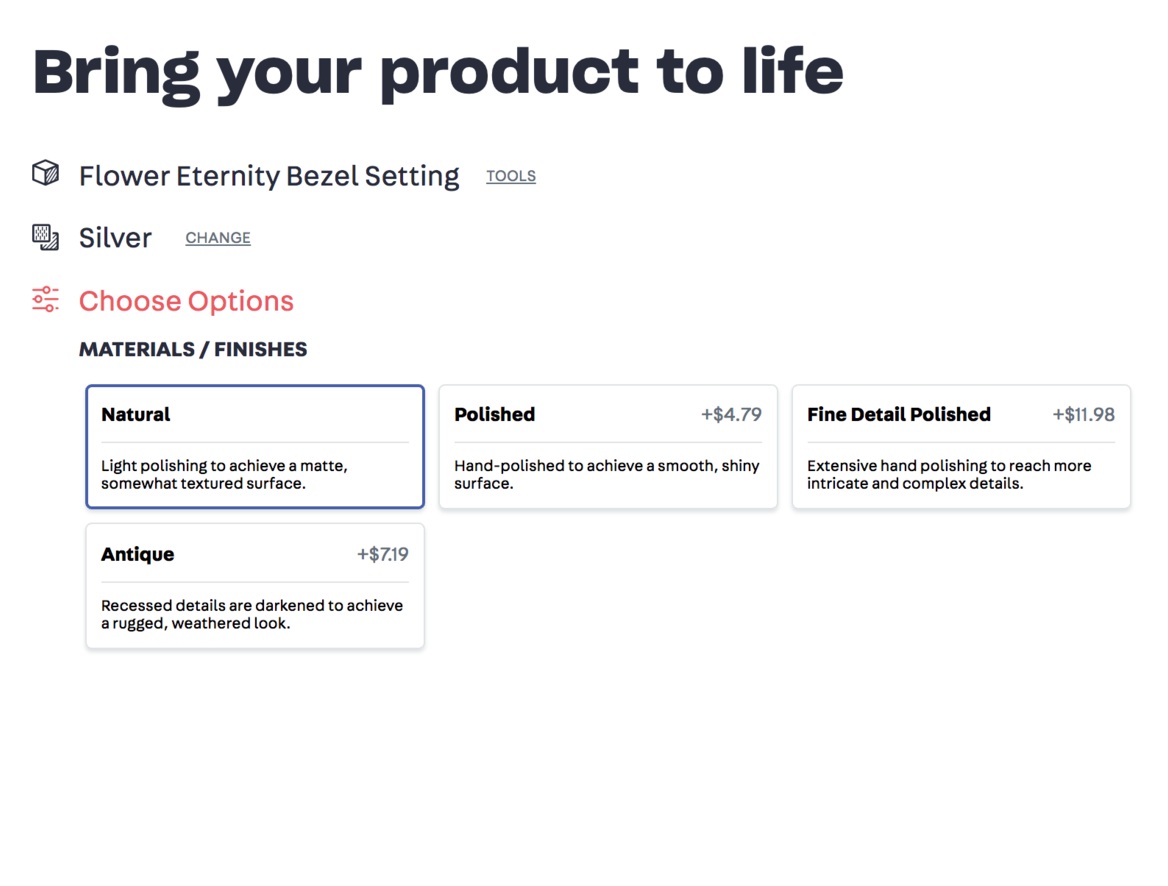
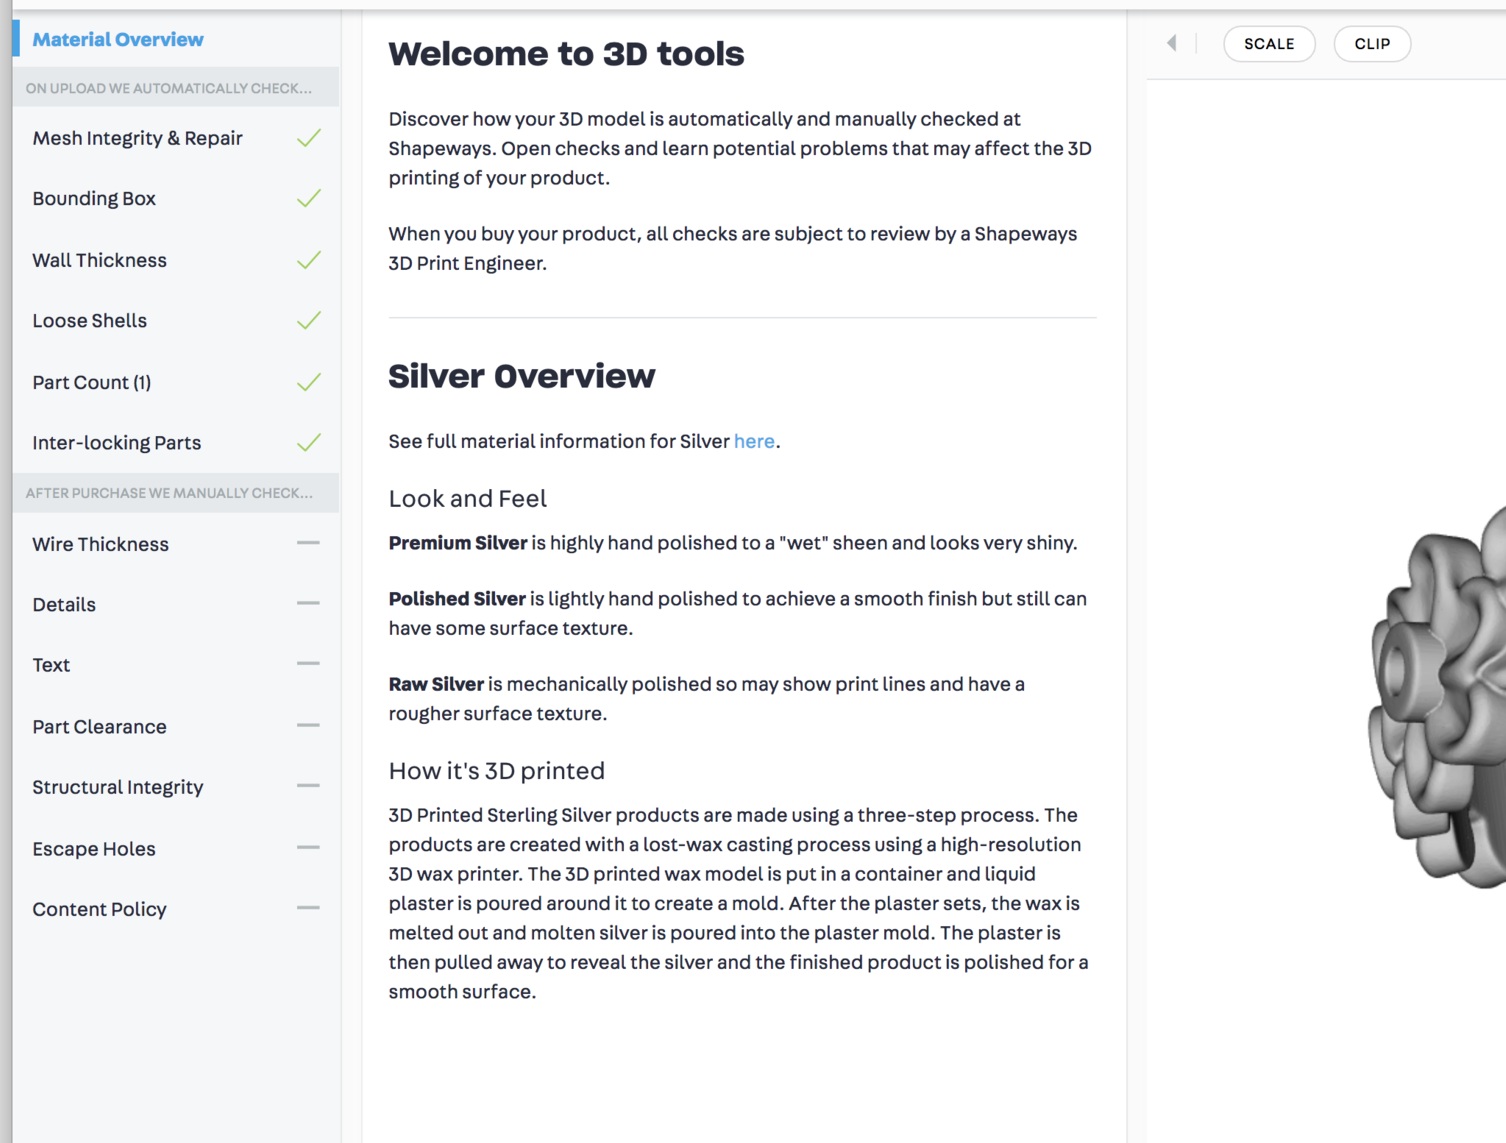
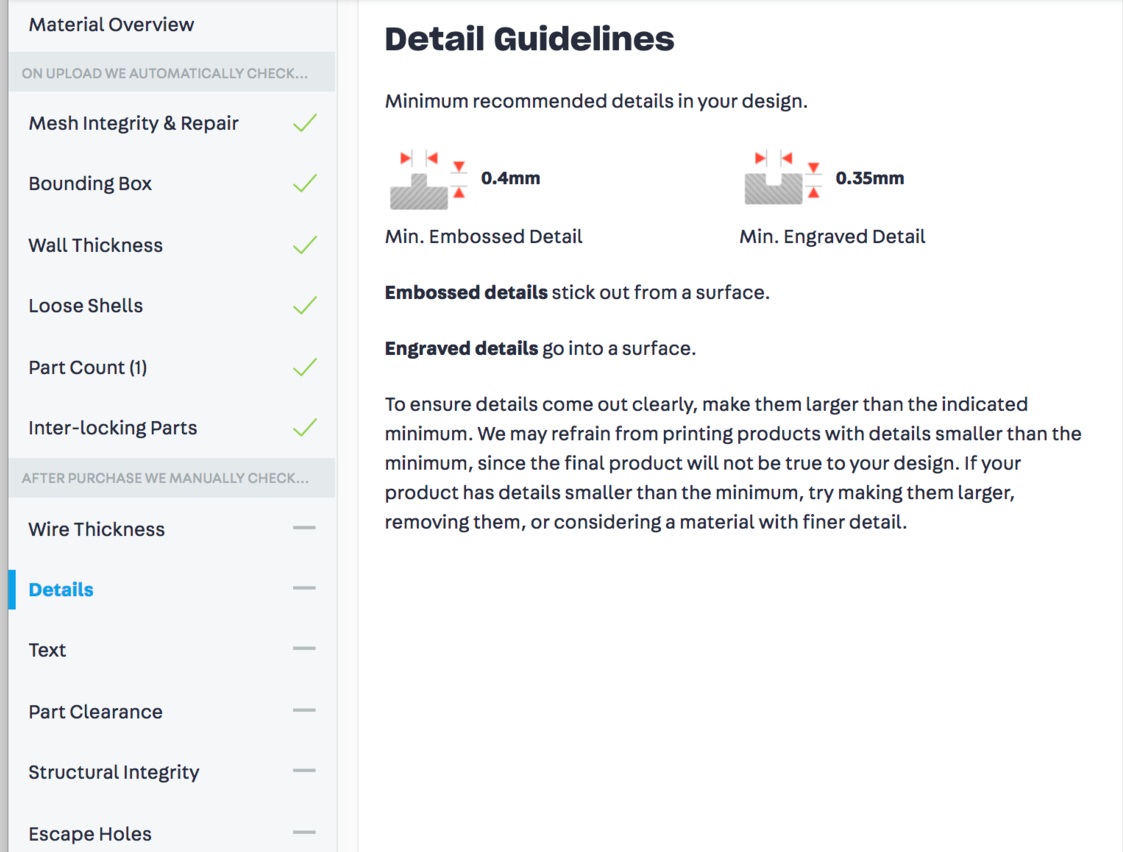
Also, there is another tool available. See below where it says TOOLS next to the title “Flower Eternity Bezel Setting?” If you click on that you’re directed to a 3D Tools page that will evaluate your model, and give information about the materials and printing.
Check out the images below, or you can click here to see the model for yourself!
rendering...way cool!
One of the things I have just kind of accepted while working with ZBrush is that the rendering engine leaves a lot to be desired. If you want to invest a LOT of extra money into another piece of software—fantastic software—you can purchase Keyshot, which will allow you to apply photorealistic textures to your models.
Enter Blender.
And I thought ZBrush was complicated…oh…my…God. Blender made my head spin. But I’m pleased to say that after a recommendation from my new Facebook friend (and “Cyr” wheel instructor), Nick Carter, he turned me onto a really great Blender tutorial on YouTube. And before you know it, I’m modeling a donut and a cup of coffee, and I’m well on my way to rendering some jewelry.

Ring rendered in ZBrush
So you may wonder, “Kat, what the heck are you talking about?” If you’re new to CAD and 3D modeling, then you model some stuff and you’re thrilled at what you’ve made. Then you watch a little HGTV and notice that their 3D CAD models look really realistic. THAT’S photorealistic rendering. Or sometimes you’ll see jewelry on websites and have no idea that the jewelry doesn’t actually exist…textures have been applied and lighting added, and VOILA!
Blender is another piece of software that is used for creating 3D models, scenes, and animations, and the amazing thing is that it’s absolutely FREE. And it has the ability to add those photorealistic textures. Will it replace ZBrush for me? No. I much prefer the freeform modeling of ZBrush and how much it feels like you’re interacting with real materials like clay. But for the moment, playing in Blender is giving me some really interesting results. Here’s the same ring from above with a silver texture applied and a translucent stone.
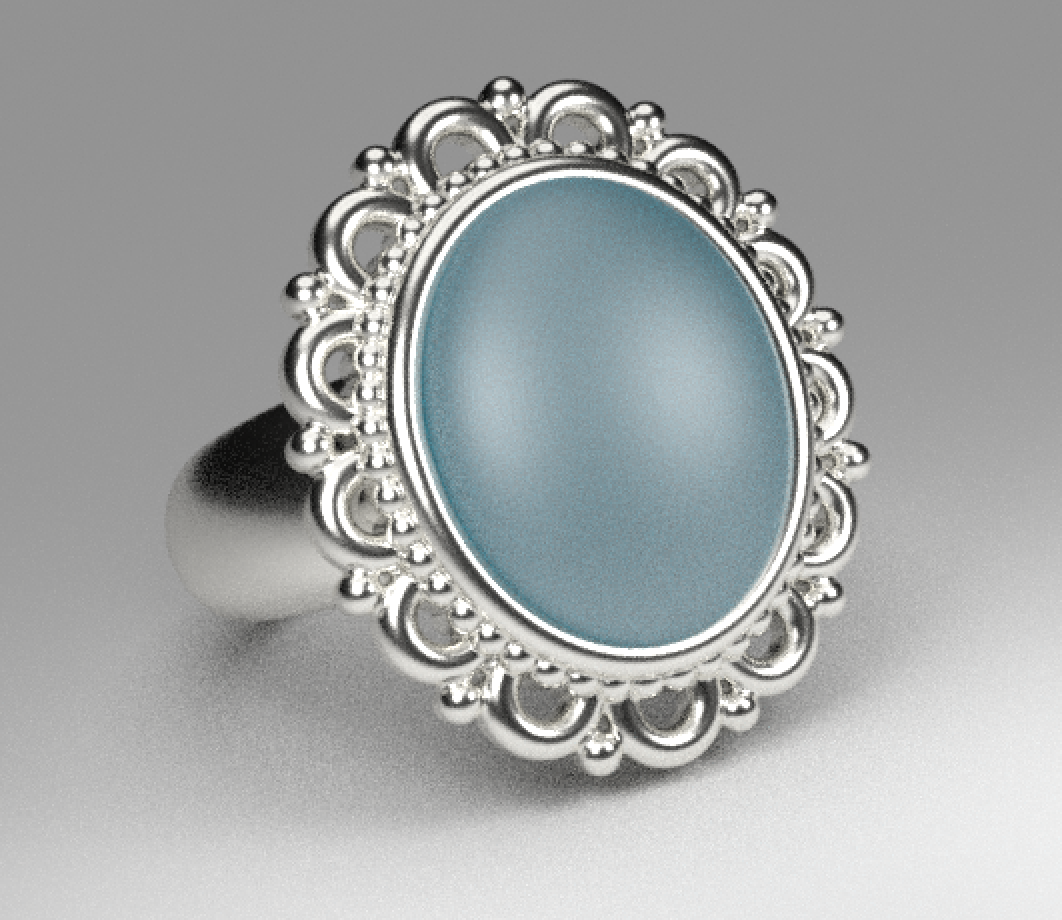
Rendering from Blender of a ZBrush model
I’m still working through some kinks…for example, underneath the ring there are some artifacts in the shadows that I understand have something to do with lighting. And I’d really like to be able to apply a patina. Overall I’m pleased with the effects!
another huichol test video
So I just ran a test last night on creating a Huichol beading tutorial using my iPad Pro with Apple Pencil, Adobe’s Illustrator Draw program to create the bead grid, Recolor, a coloring app, to color the beads, and AutoCAD Sketchbook to animate the thread path. It shows promise!
I don’t thing the text with the bead colors is necessary, but I’m looking for a way to incorporate the colors into the video. Perhaps having a “sliver” of the pattern at the bottom while showing the thread path at the top.
I’ve always wanted to know how to do the leaves that are commonly used in Huichol bracelets and those amazing necklaces…now to show that to others! Stay tuned…